Hi there! We use affiliate links where relevant for products that we love. This means that companies say, “hey thanks for telling people about us!” by giving us a small commission as a result (Trust us, guys, it’s SMALL!) That being said, our opinions are always our own. Thanks for reading!

Years ago, maybe twenty years ago, I saw an Easter craft that used natural plant dyes to color Easter Eggs. The decoration on the eggs was a leaf, laid on the egg and pulled tight around the egg with cheesecloth and held with a rubber band. They looked earthy and natural…beautiful!
An experiment using plant material, fruits and vegetables as bases for dyes for Easter eggs can be time consuming. If I’m going to this much effort to make colored eggs, I want them to last! This means blowing out the egg from the shell. I don’t know how you feel about mouth to raw egg, but I hesitated to pucker up and blow raw egg from a tiny hole. I explored other methods for separating the egg from the shell and discovered a kit Called Blas-Fix. This kit is made by a German company, Brauns Heitmann, and includes a vacuum pump and cleansing device, a long metal tube, and a small hand turned drill. After shipping, the egg blowing kit is only $12, and can be used year after year.
A trip to the grocery store to buy produce, white vinegar and lots of eggs was my next mission. All items in hand, I began with blowing out the eggs using my kit. The long metal tube is supposed to fit onto the long tube of the baffle (yellow accordion thing!). My metal tube would not fit onto the baffle. I used a piece of rough sandpaper to twist and rub the end of the baffle tube to make it smaller. The sandpaper worked but I shaved off a little more of the baffle tip with an utility knife. After a little finessing, the baffle and metal tube were joined.
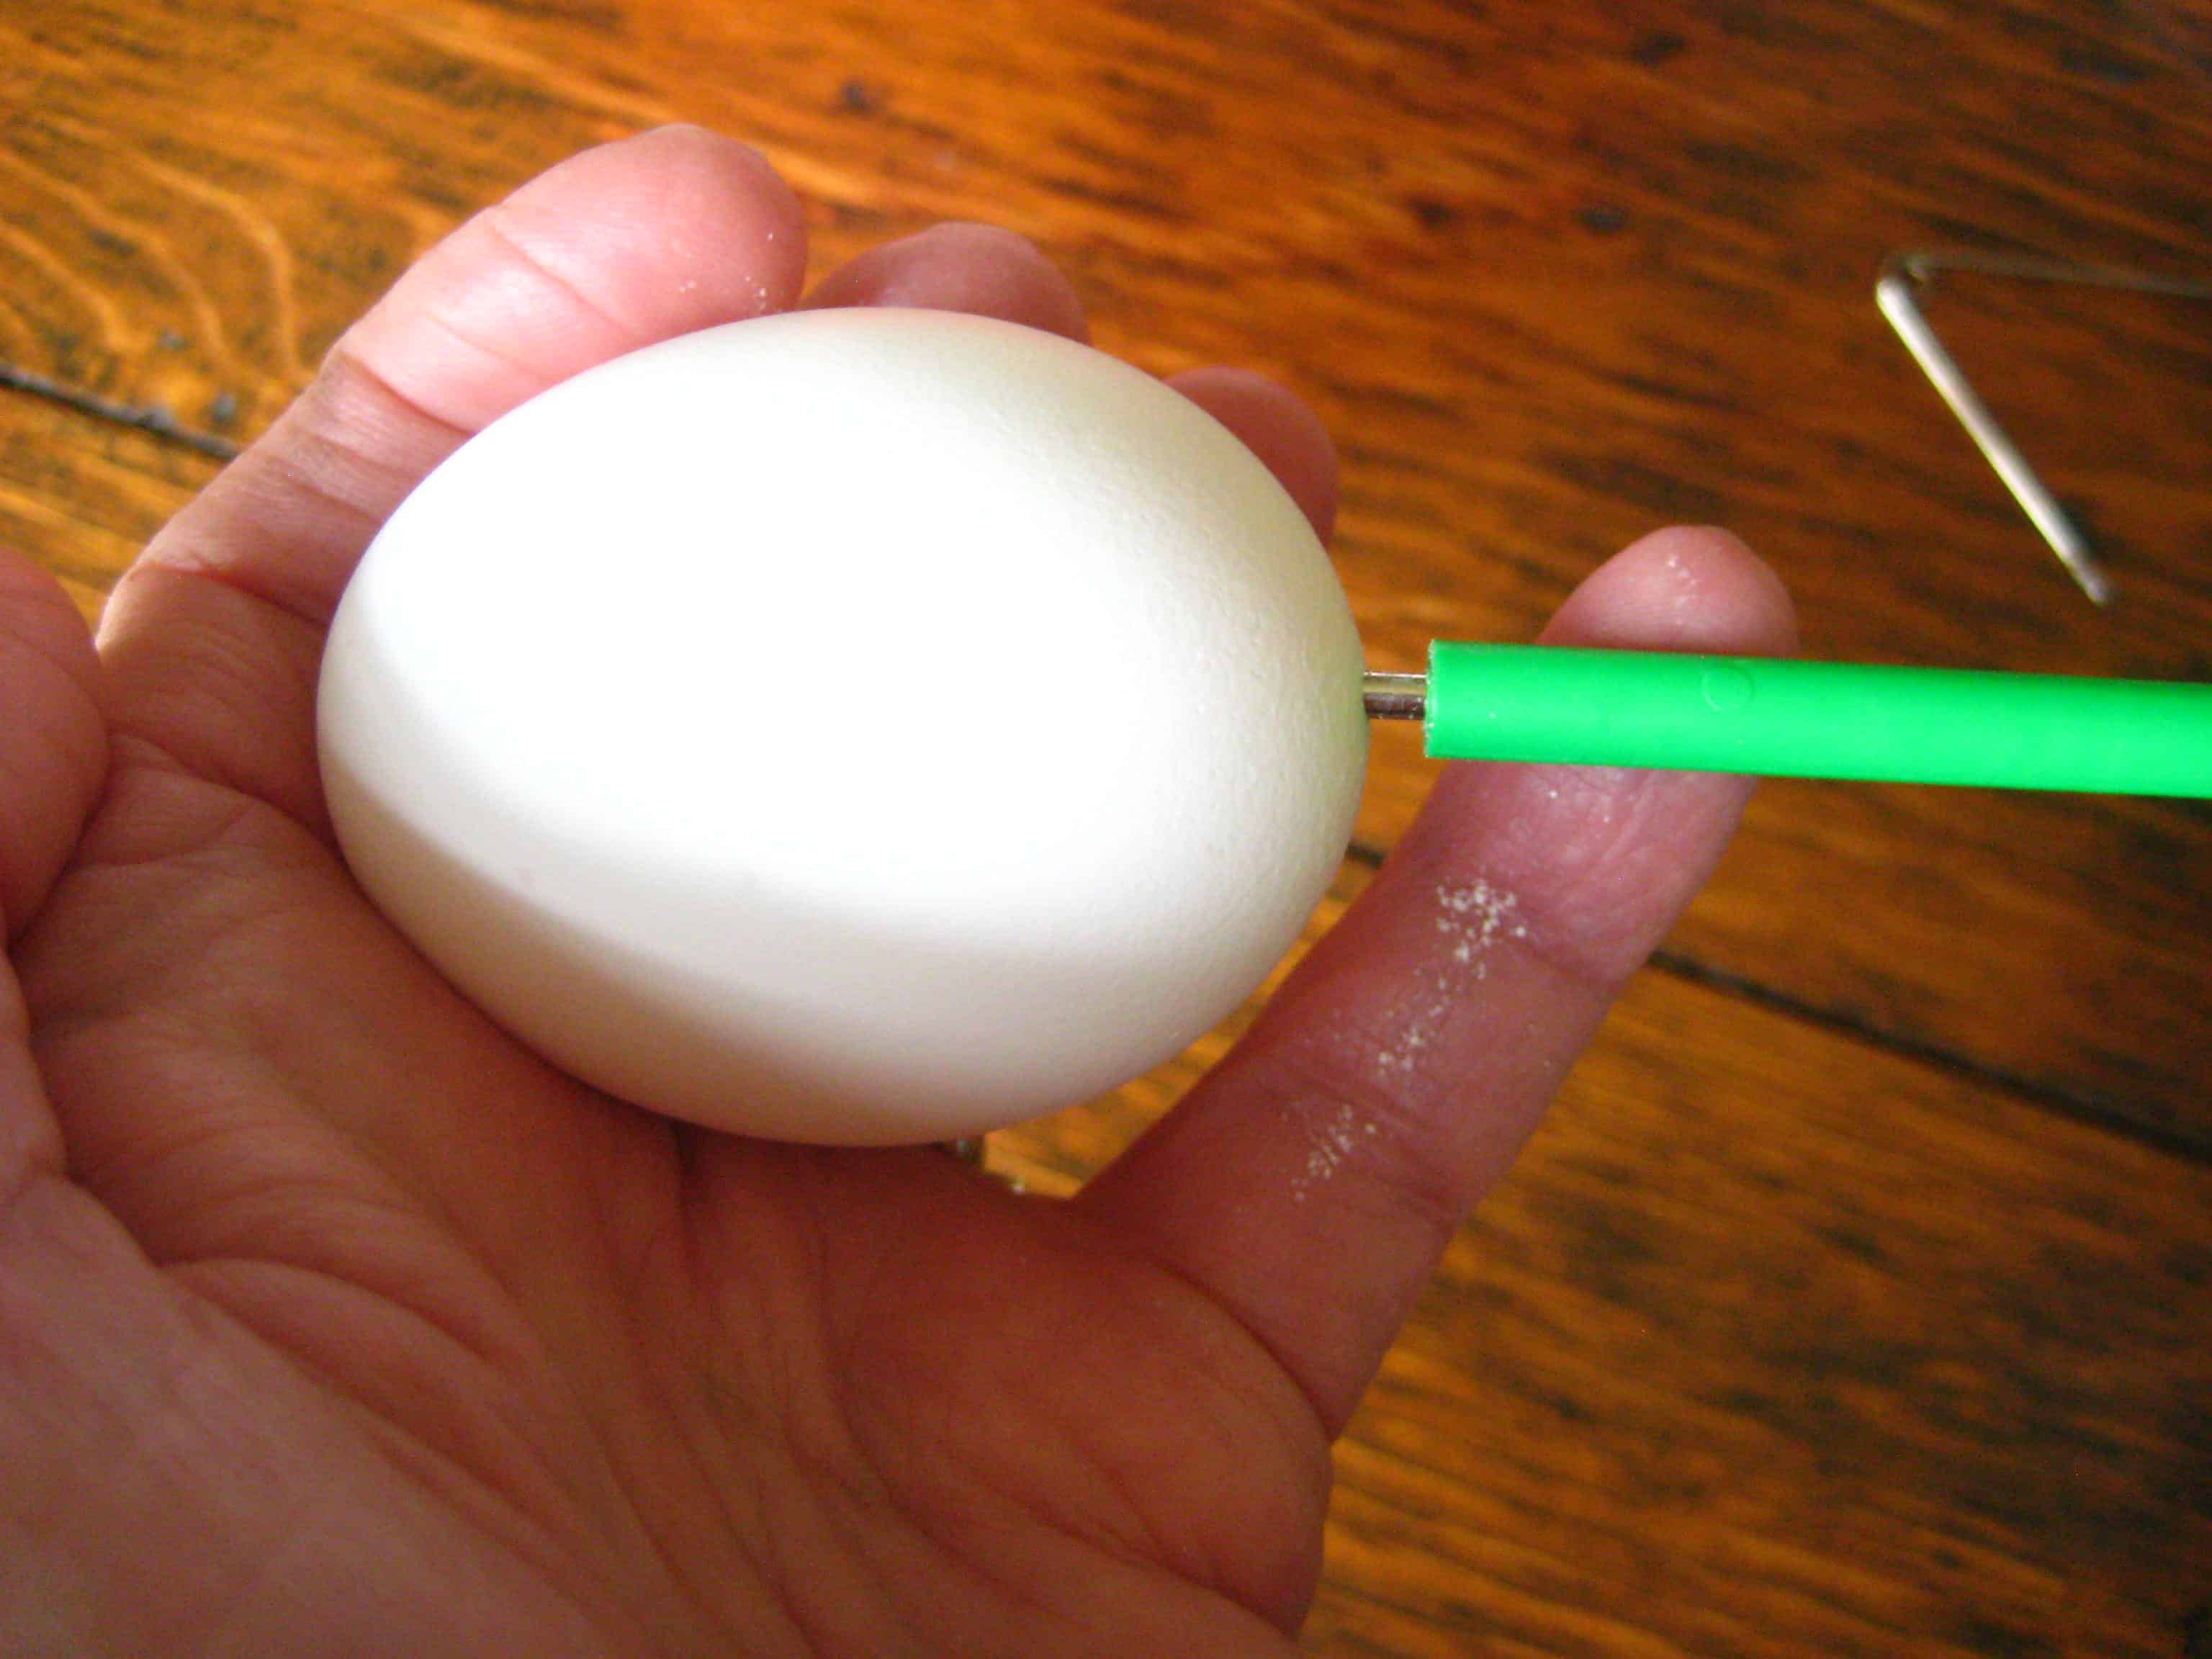
The next step was to use the little drill, with the green handle, and make a little hole at the end of the egg. Using the drill tip to make the hole in the egg was a problem for me. The hole in the egg was too big and just plain ugly. I solved the problem by using a large safety pin to make the initial hole in the egg and then followed up with the drill. Problem solved…the pinhole was just enough depression in the surface of the eggshell to allow the drill to stay in place. You can see in the photo the egg shell residue falling down on my finger.
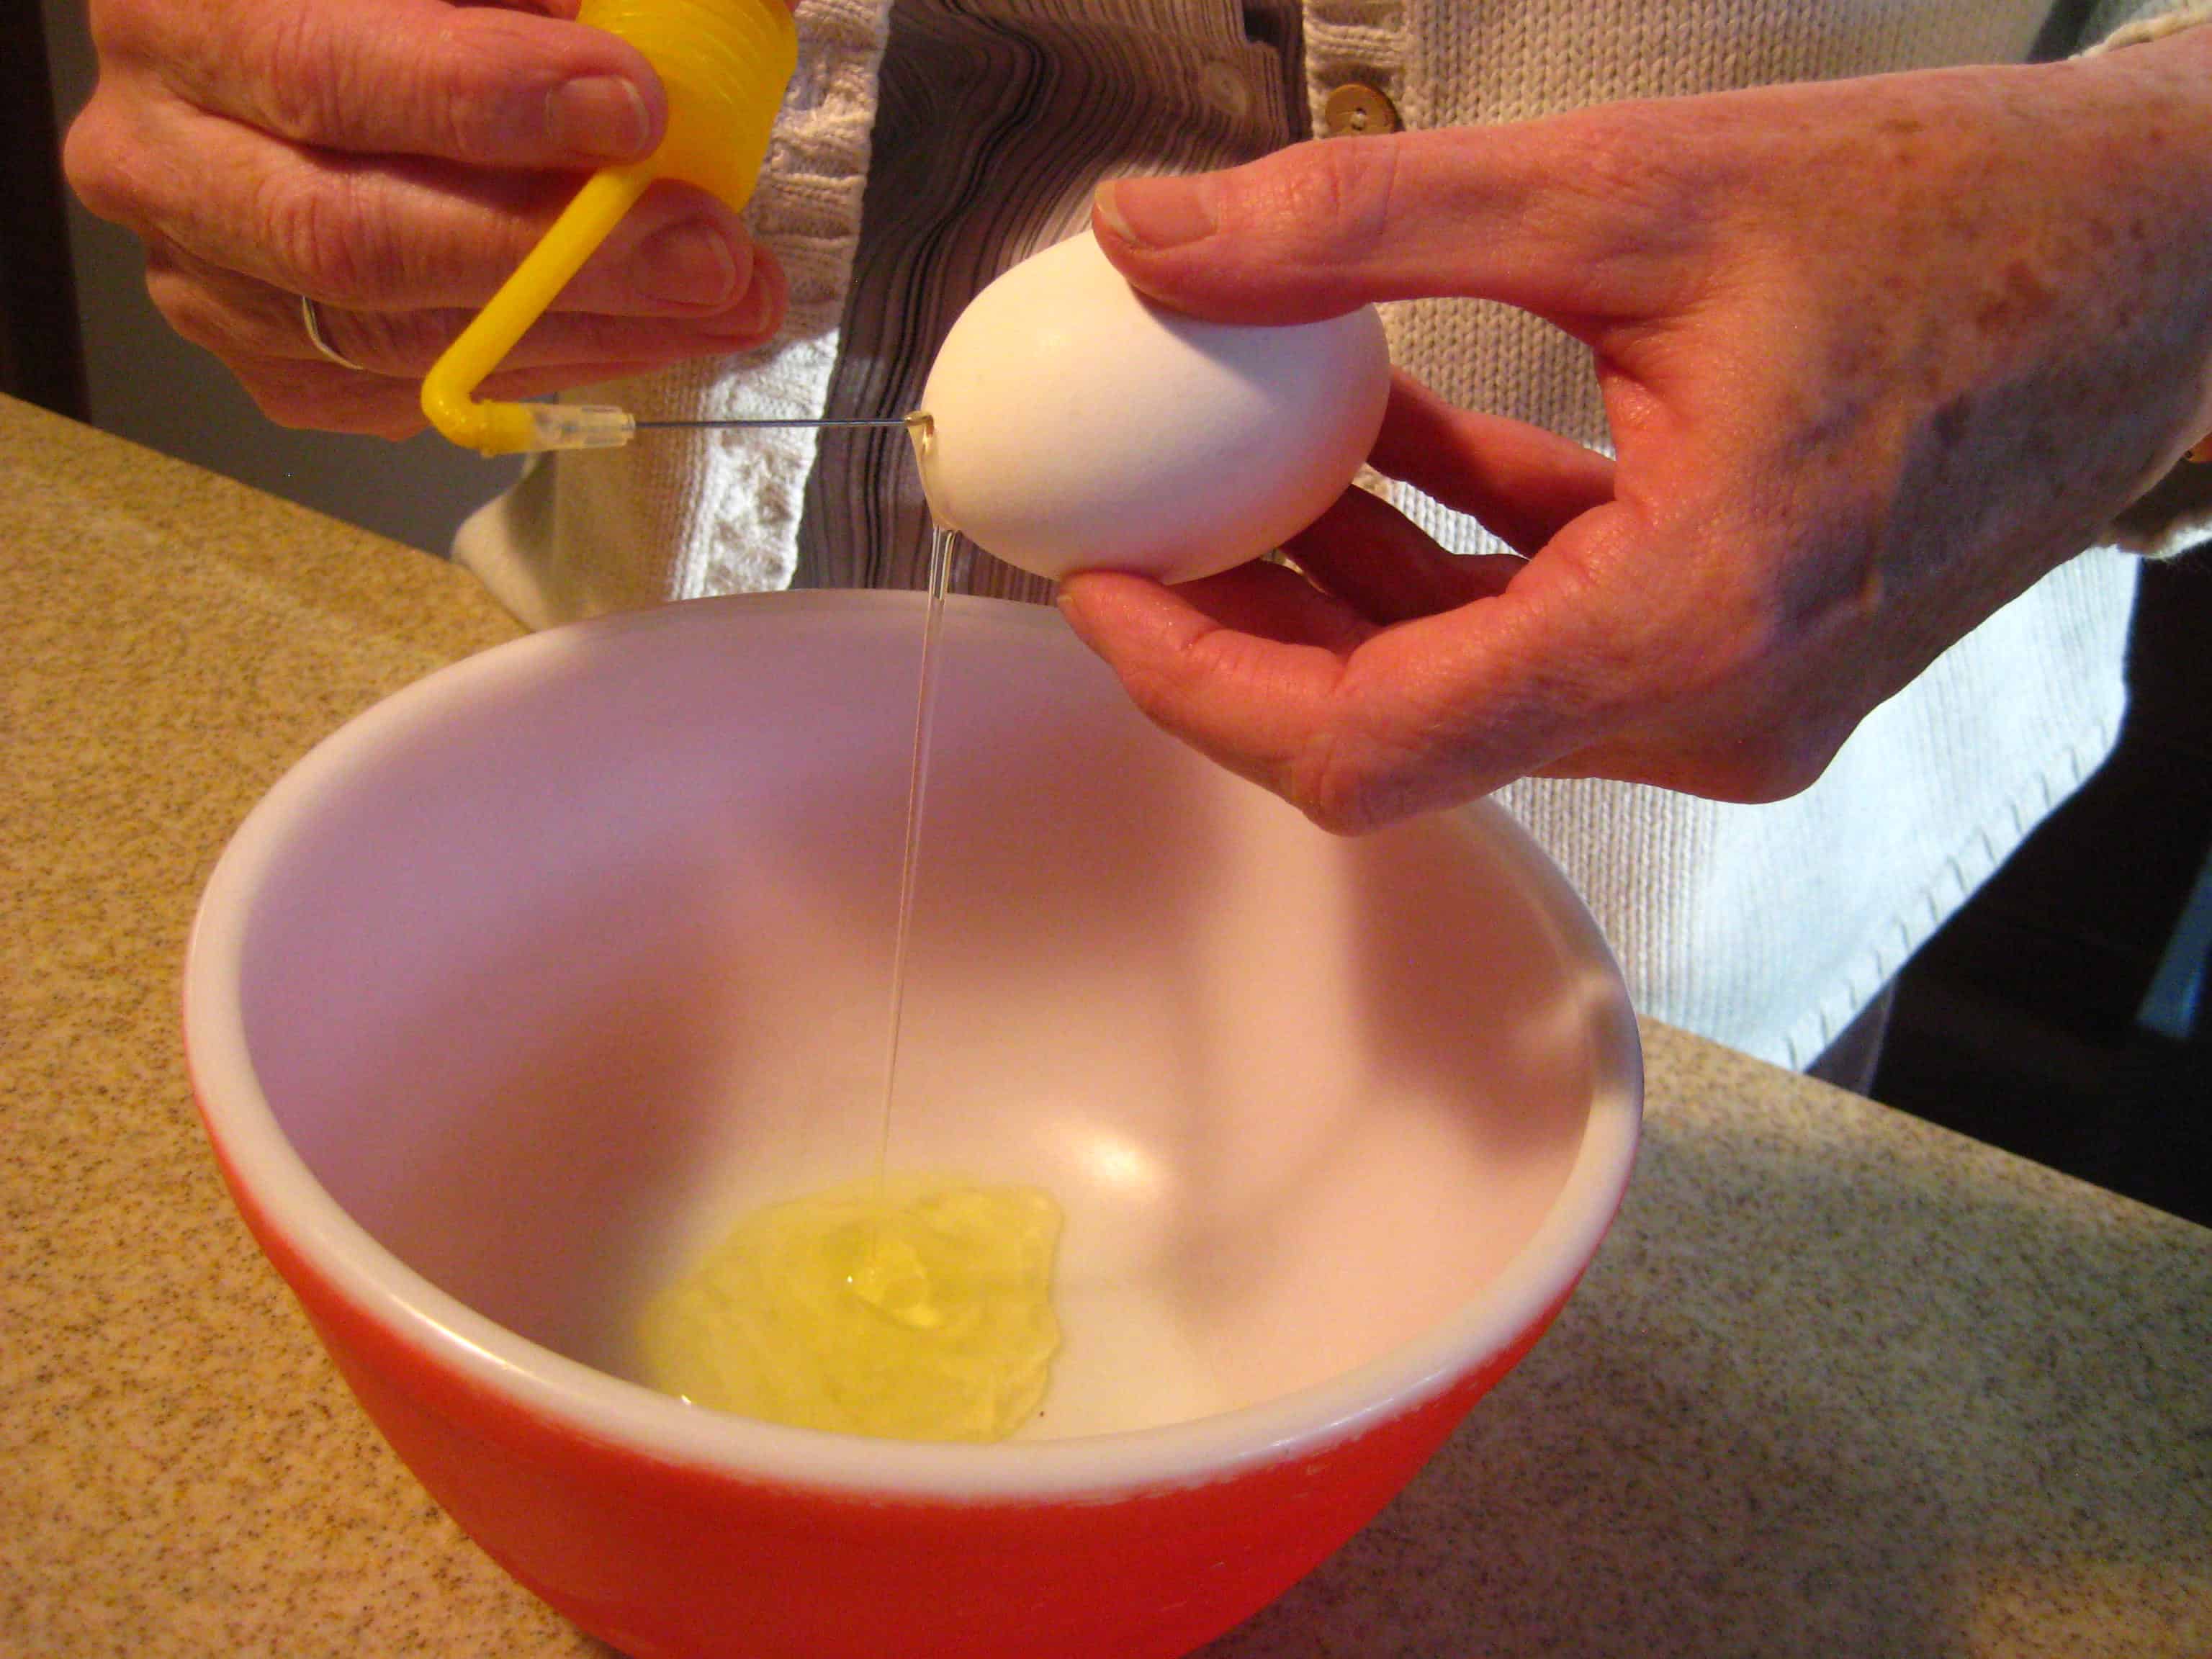
Once the drill is through the eggshell, the next step is the insertion of the thin metal tube that is attached to the baffle up through the hole in the egg. I wiggled the tube around to break up the egg yolk. Keeping the hole of the egg facing downward, and the baffle upright, place your thumb over the hold and slowly depress the baffle pushing air into the egg and forcing egg out the hole. Do this step over a bowl so that you can collect the egg white and yolk to use in recipes or for breakfast the next morning. If you happen to have an egg that has a crack not visible, once you blow in the air it will probably push the cracked portion out ruining your lovely egg. Losing a few eggs in this way just means more scrambled eggs for breakfast.
After you blow out the eggs from their shell, you use the same baffle to fill the egg shell with water to rid the inside of egg residue. Put the baffle under running water and let the hole in the baffle open so the water can enter. Once the baffle is filled with water, insert the needle into the egg, cover the hole of the baffle with your thumb and push water into the egg. Once all the water from your baffle is in the egg, remove the needle, cover the hole in the shell with you thumb and shake the egg. Remove the water in the same way you removed the egg. You may want to complete this procedure twice to throughly rinse the inside of your egg.

Store the eggs in a carton, hole facing down, to let the water drain from the egg.
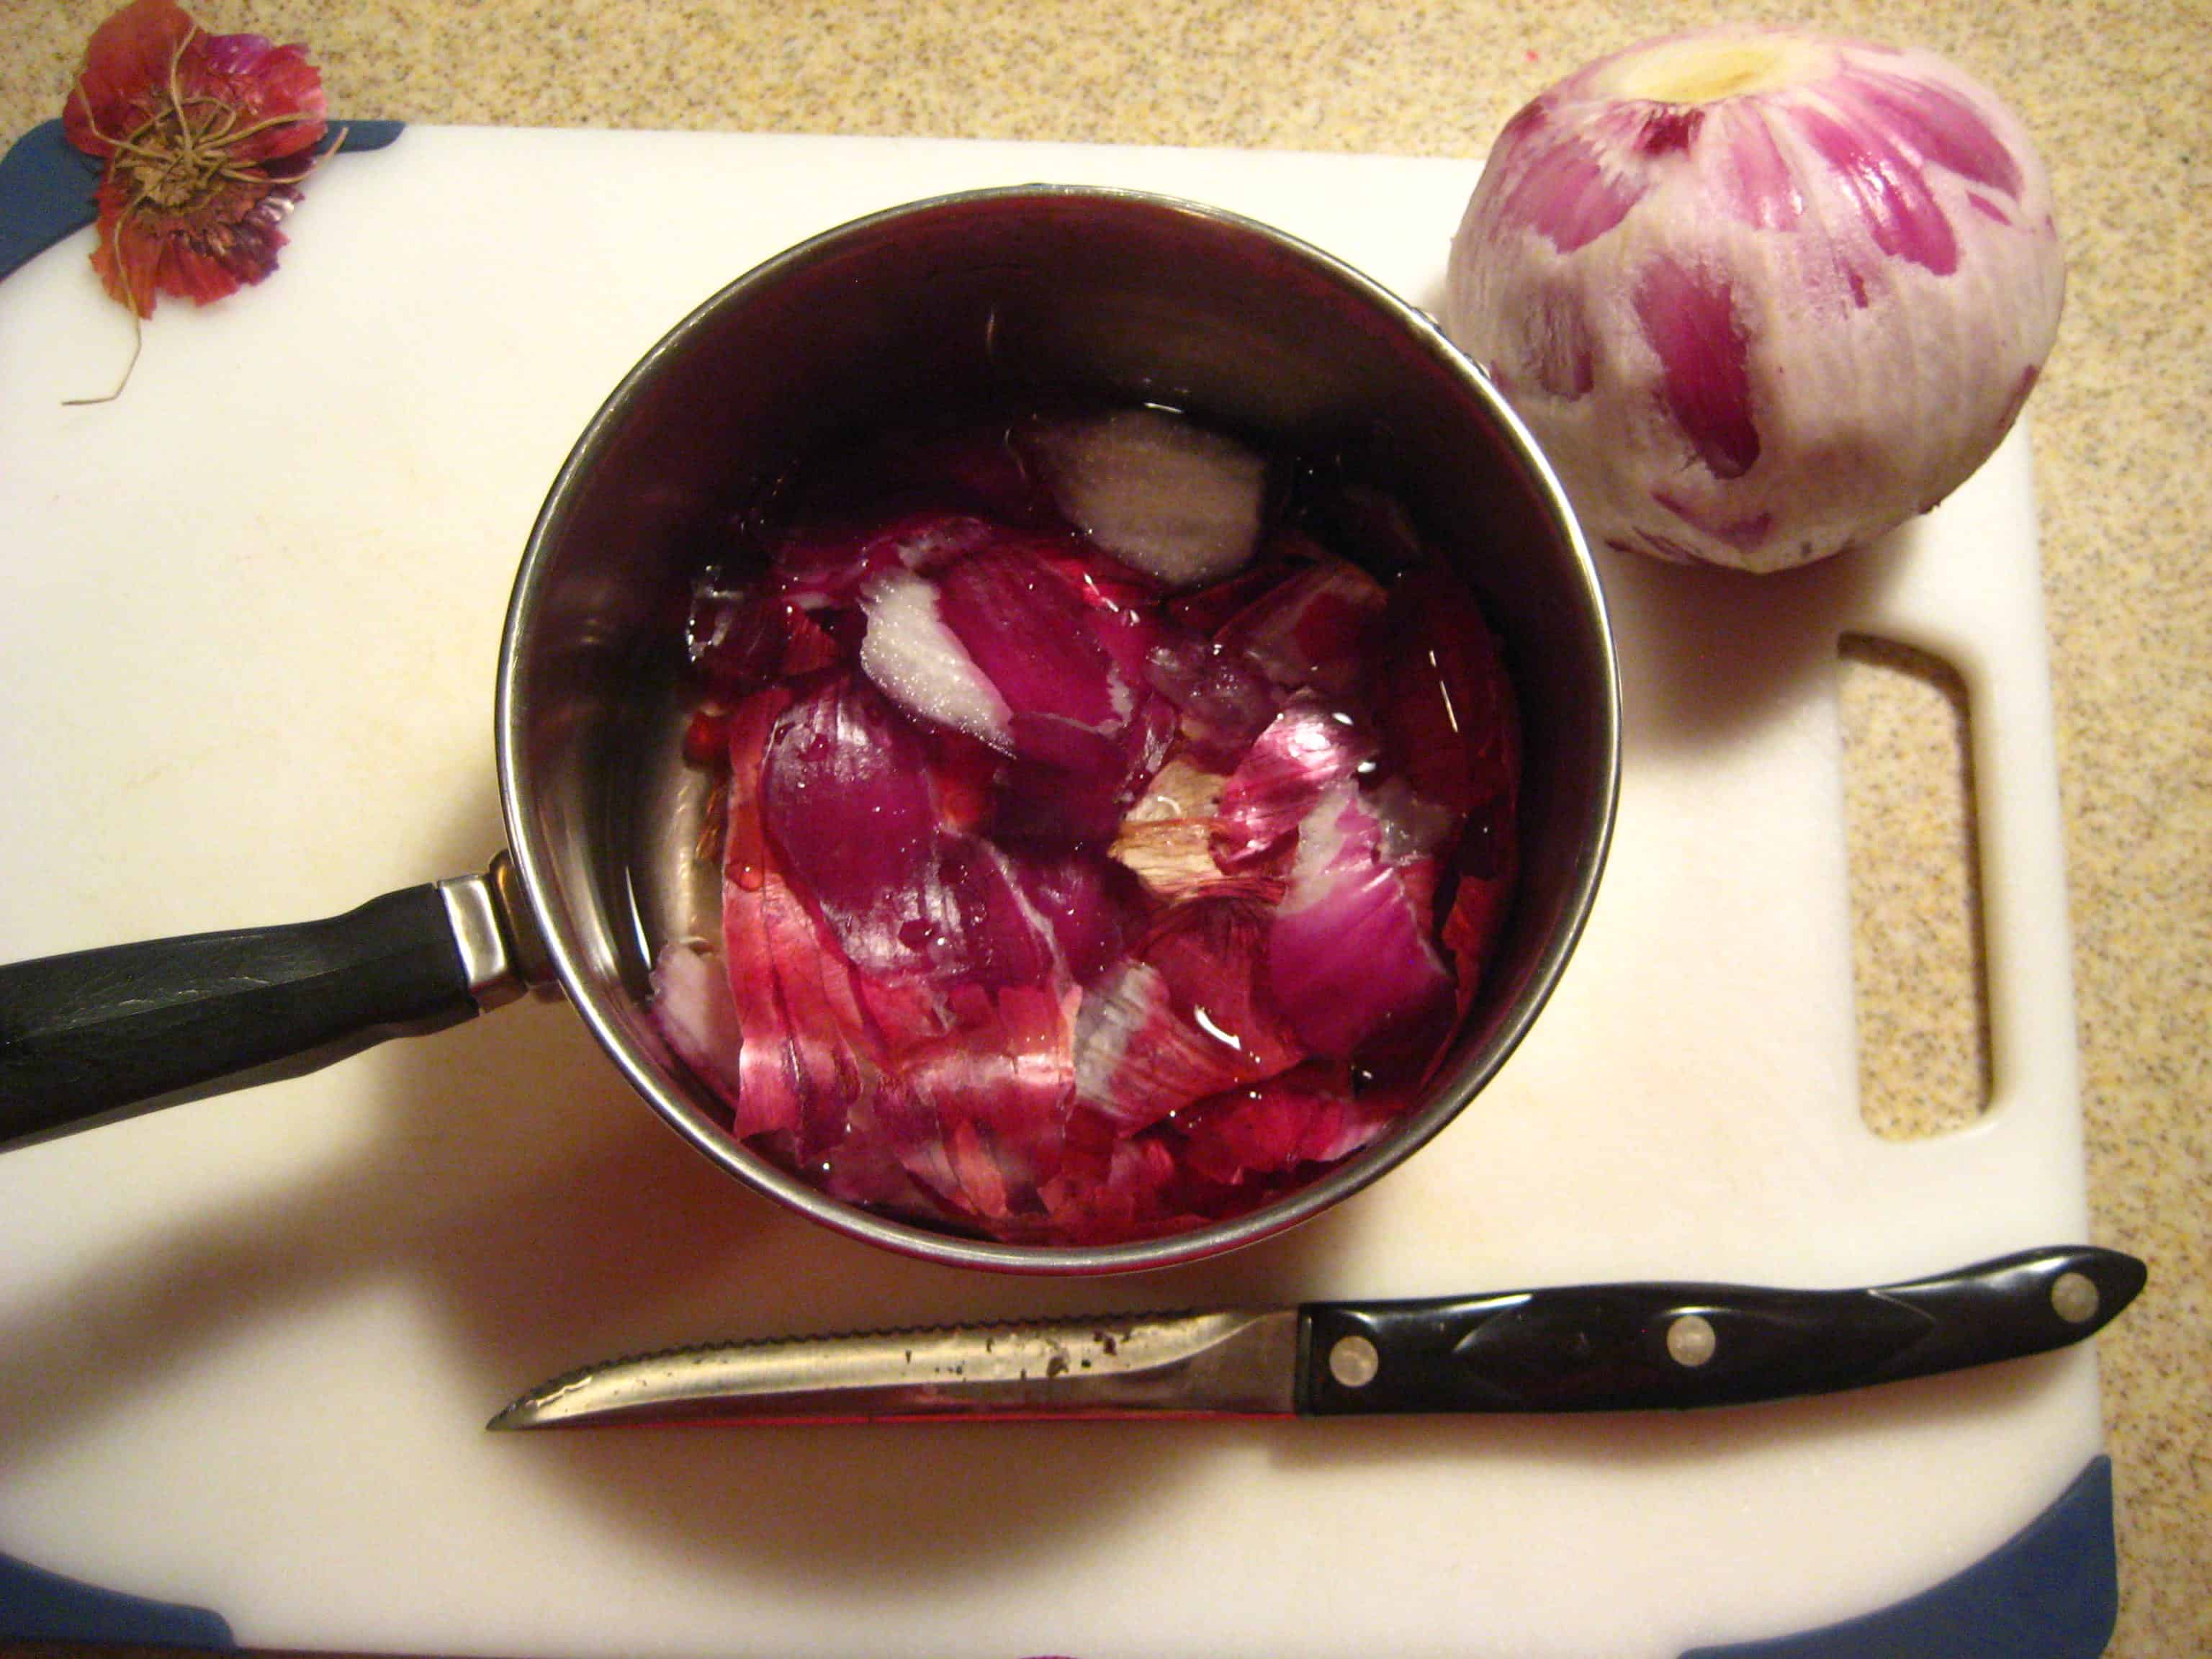
While the eggs were draining, I prepared my purple onion to use as a vegetable dye. I peeled layers of purple from the outside of the onion and put them in a little sauce pan. I added a little water to cover the onions and then simmered over a low heat. Once the onion cooked down and I could see that the water was a purple brown color, I removed the onions from the heat. I strained the onions keeping the liquid in a little bowl and adding a little vinegar. Vinegar is used as a liquid extender and an acid is generally used in dyes.
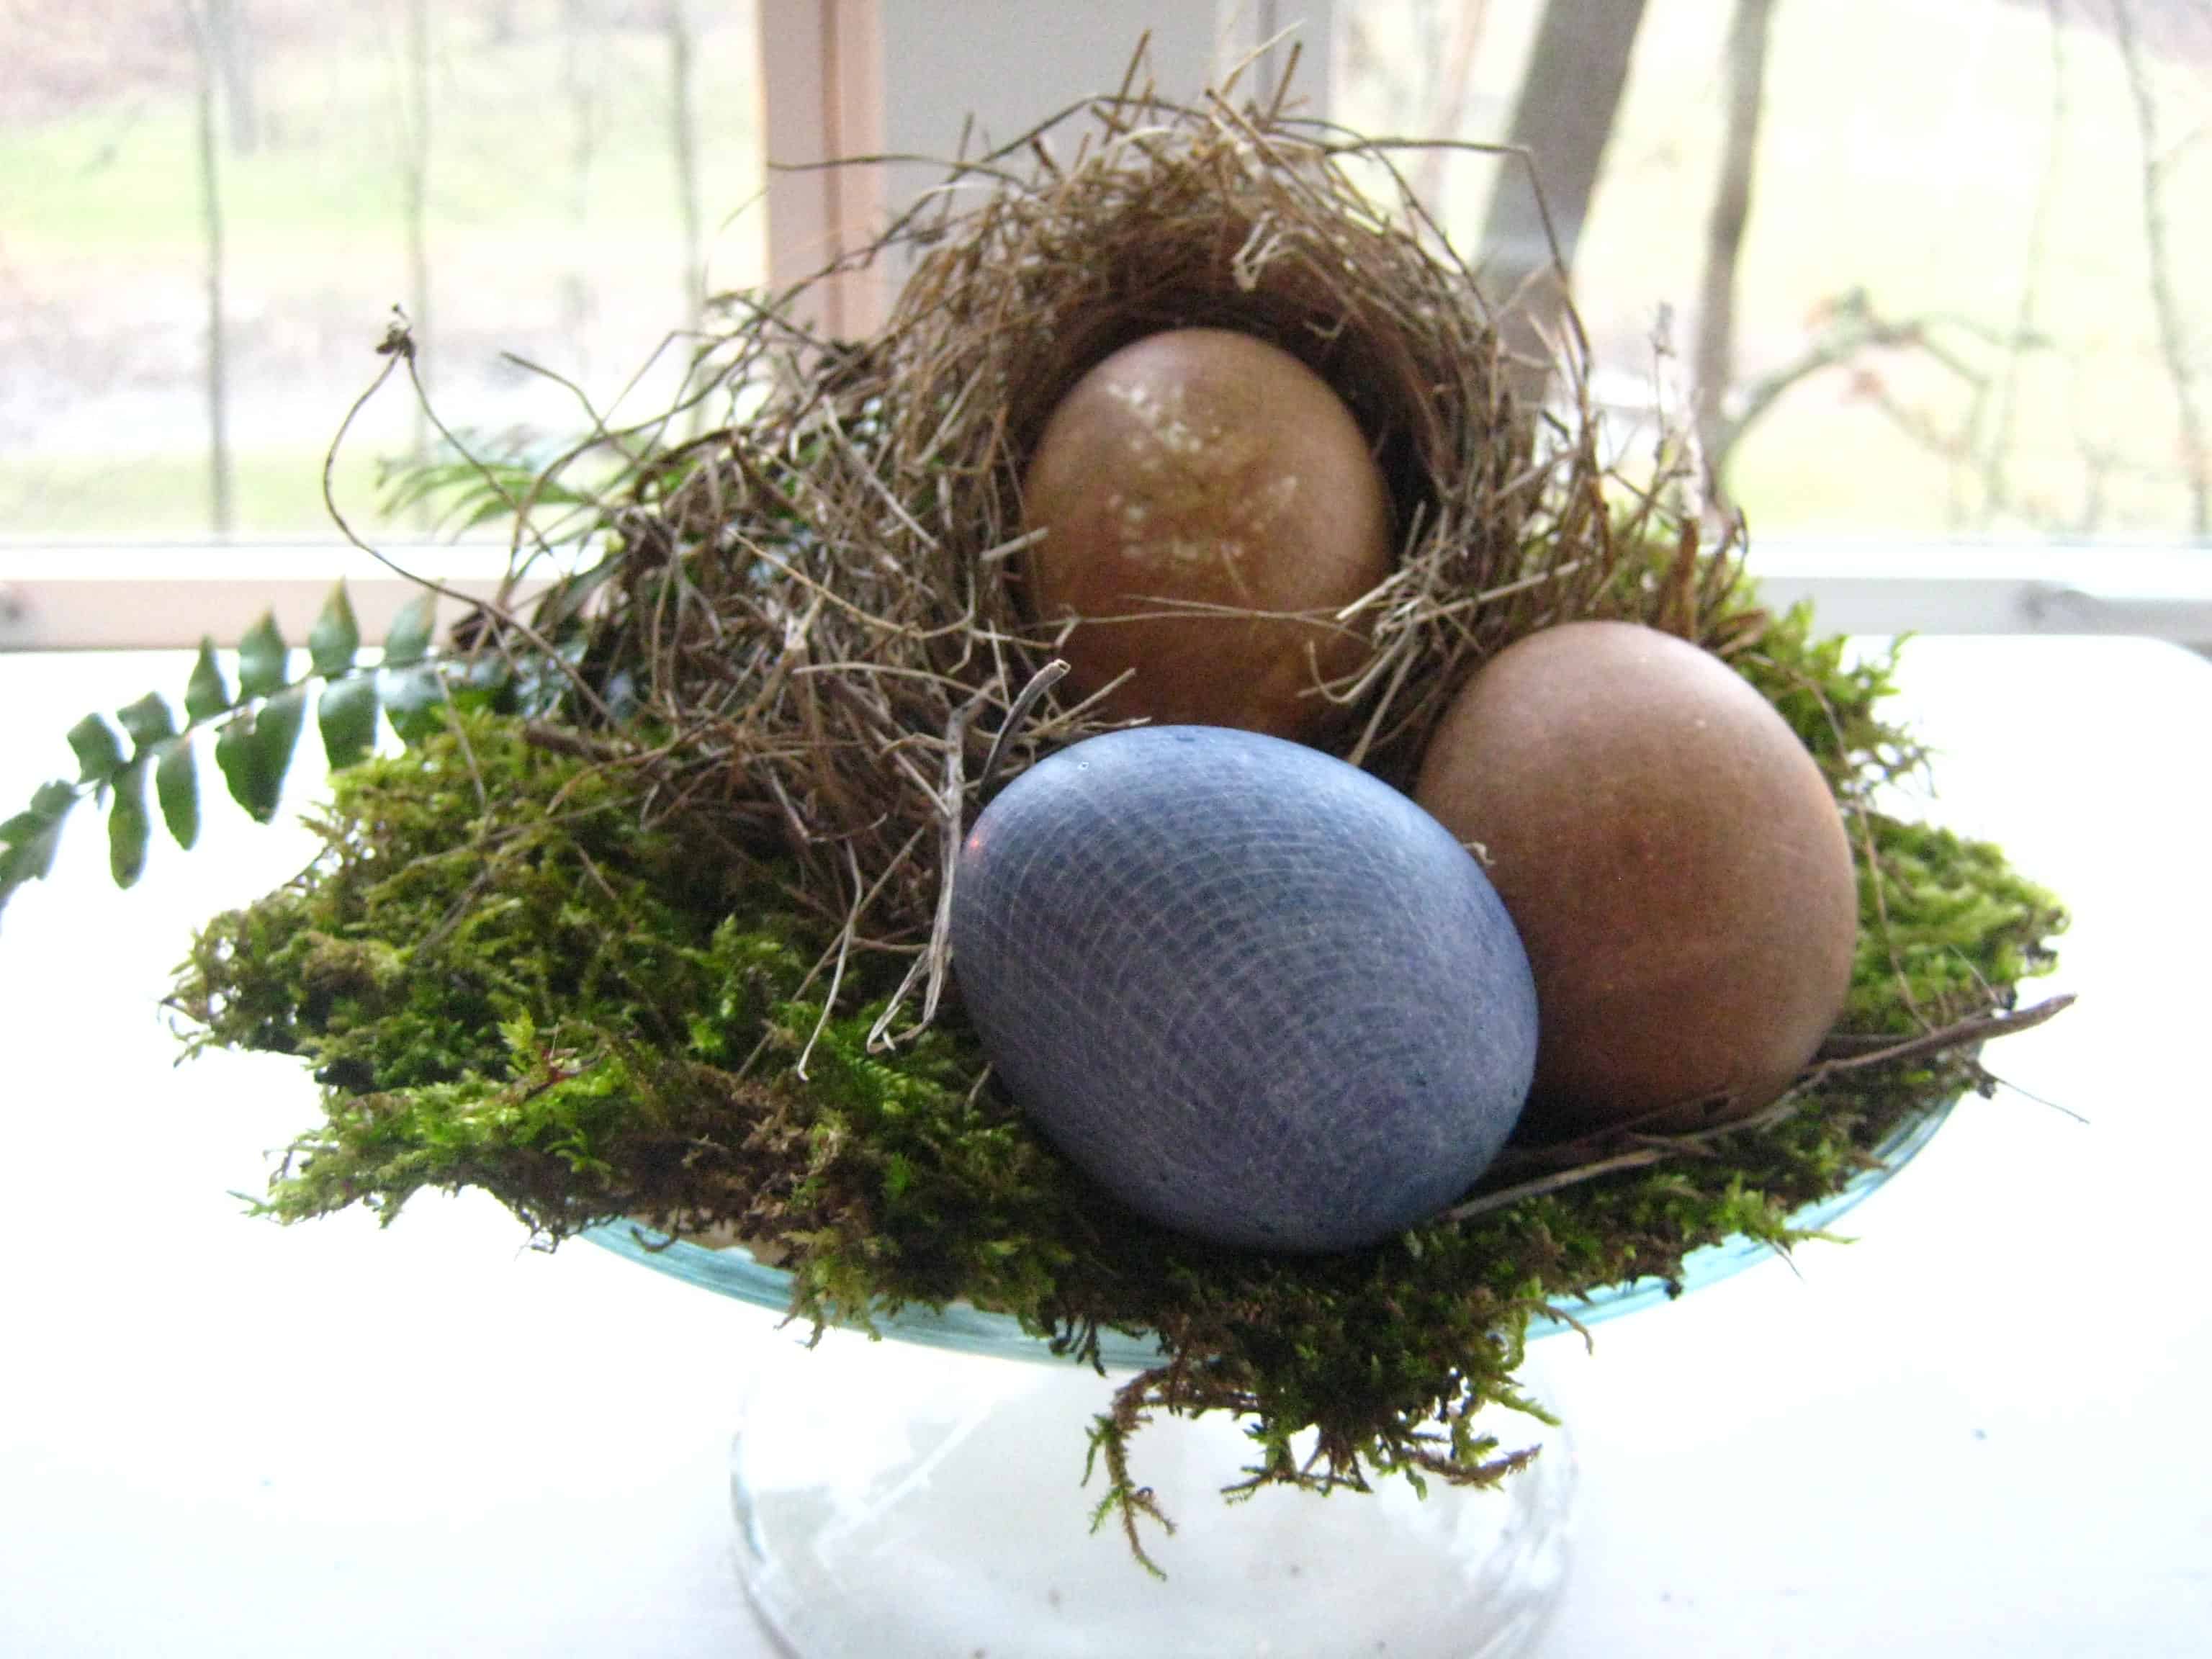
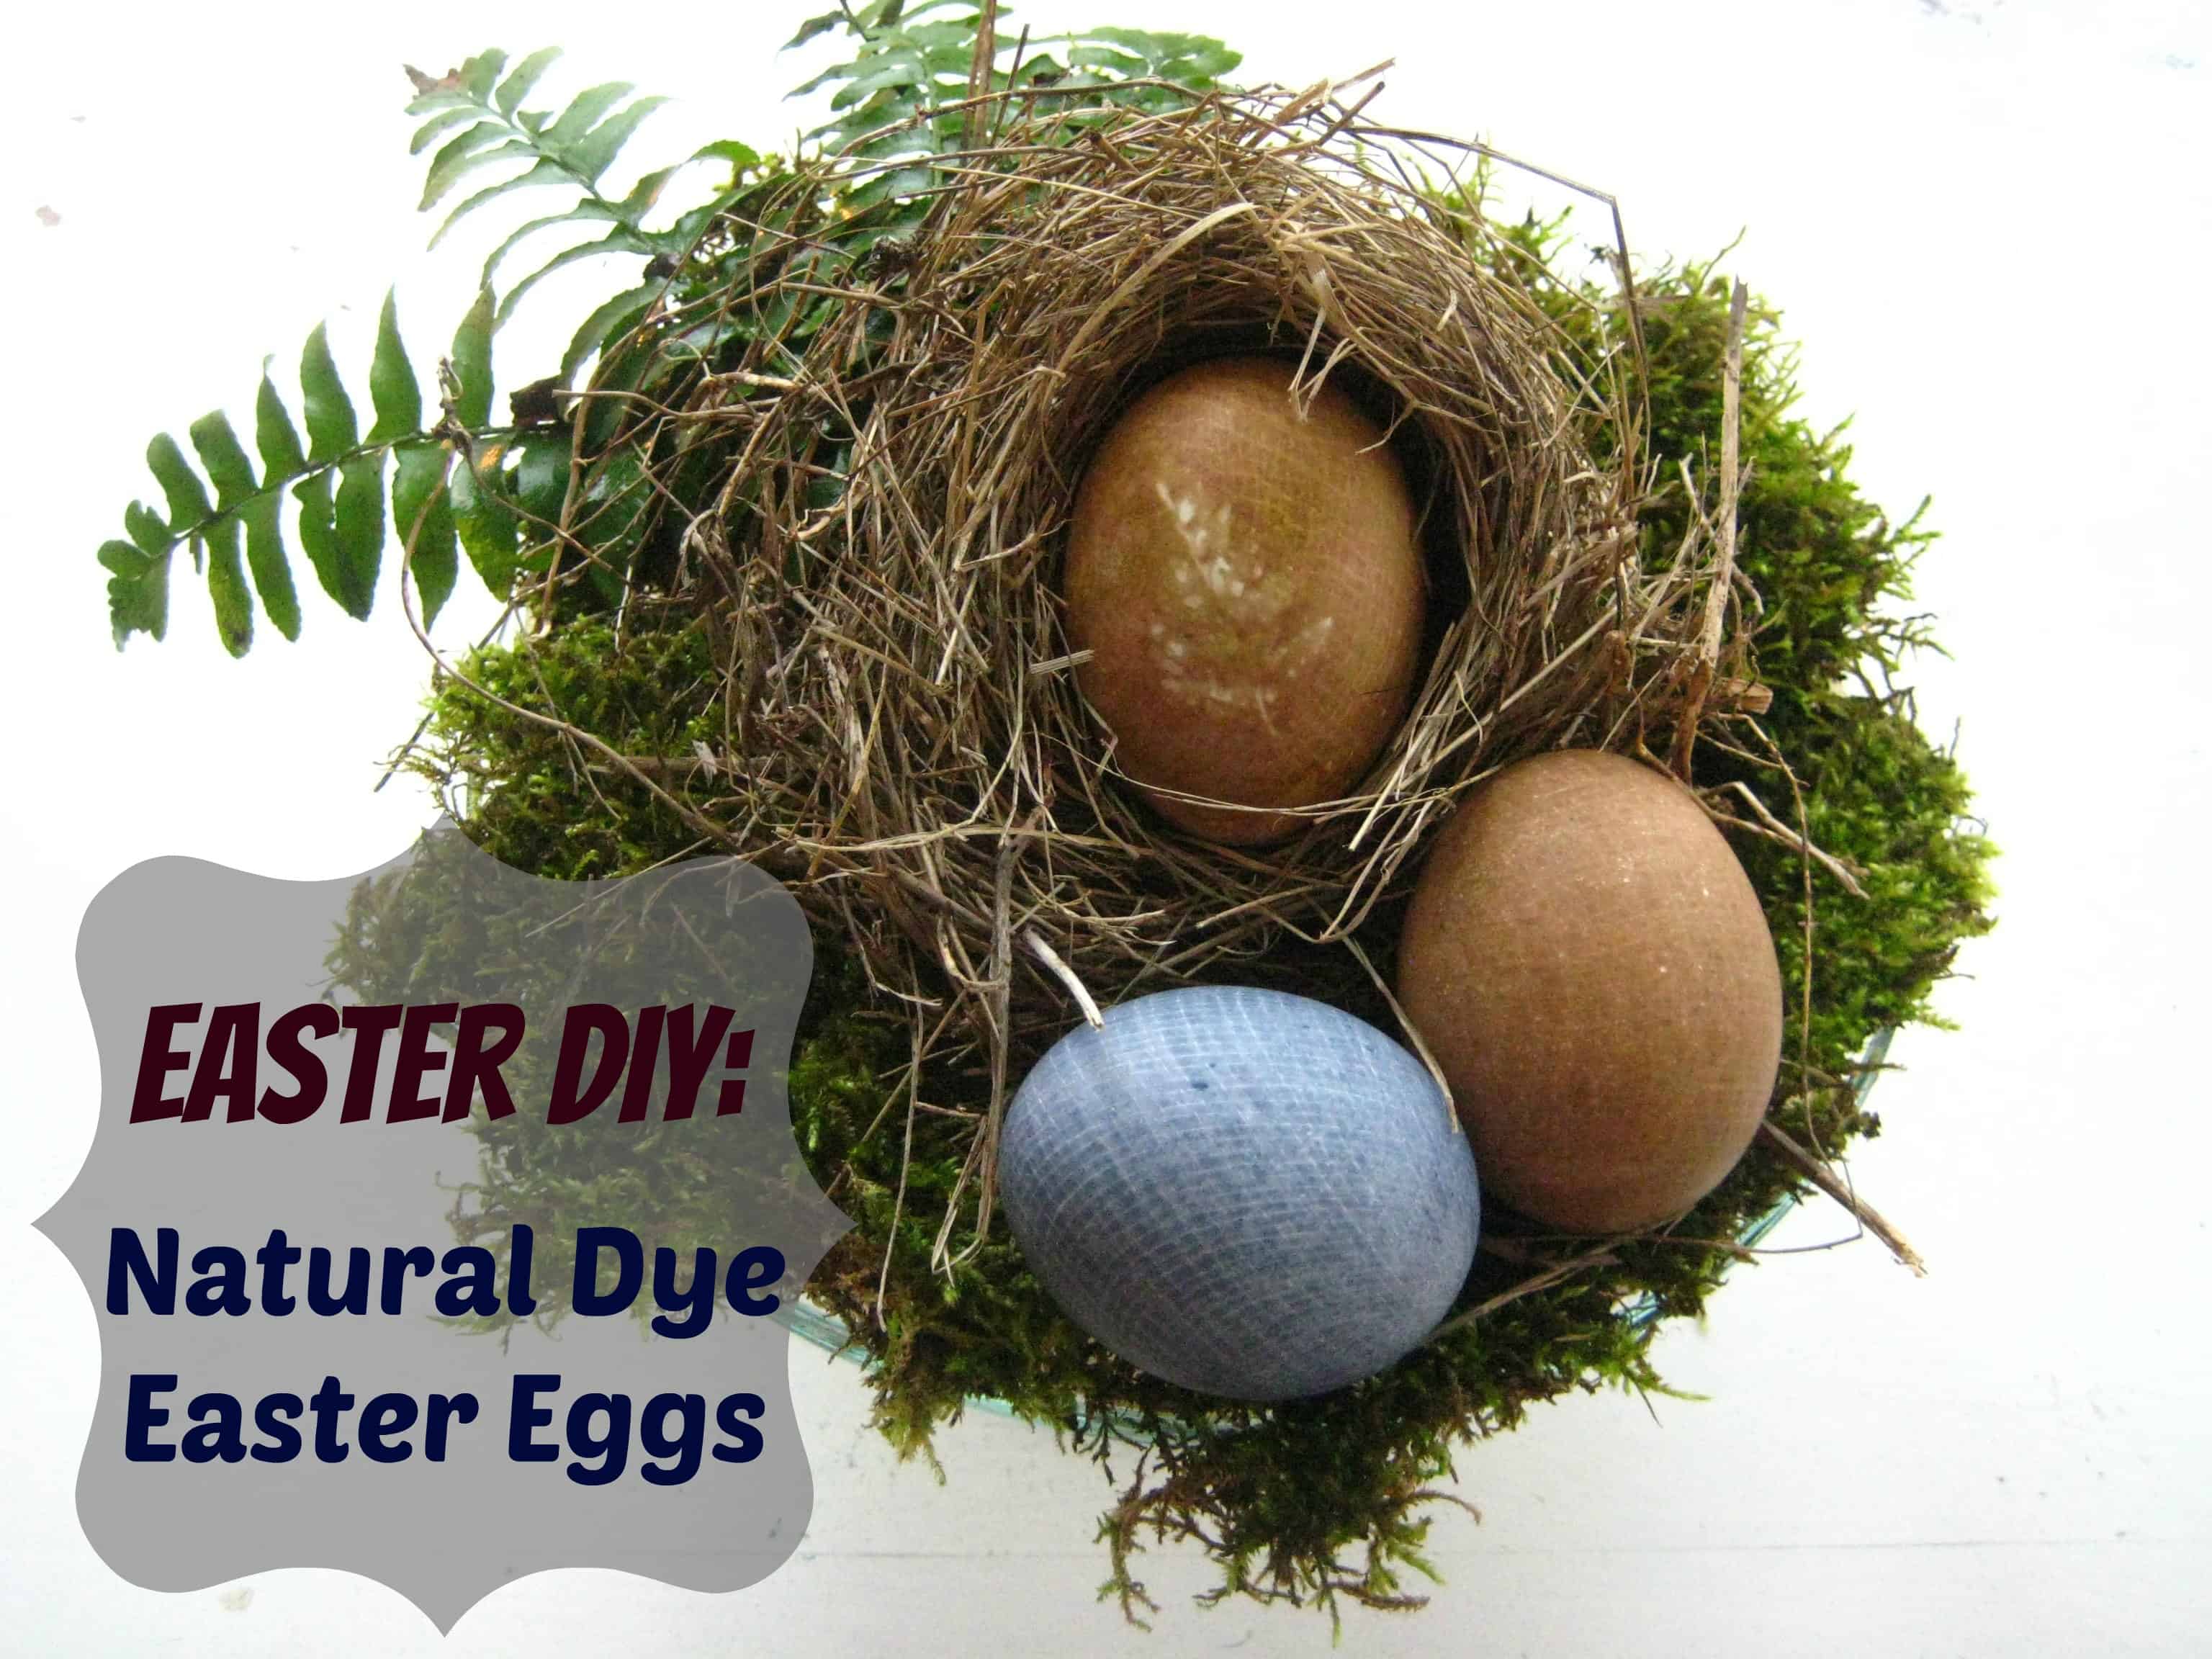
I cut out a large square of cheesecloth, about two to three layers, and laid the egg on the cloth. I took the fern and laid it on the egg, and place that part of the egg face down on the cloth. Gathering the cloth together, I secured the cheesecloth with a rubber band.
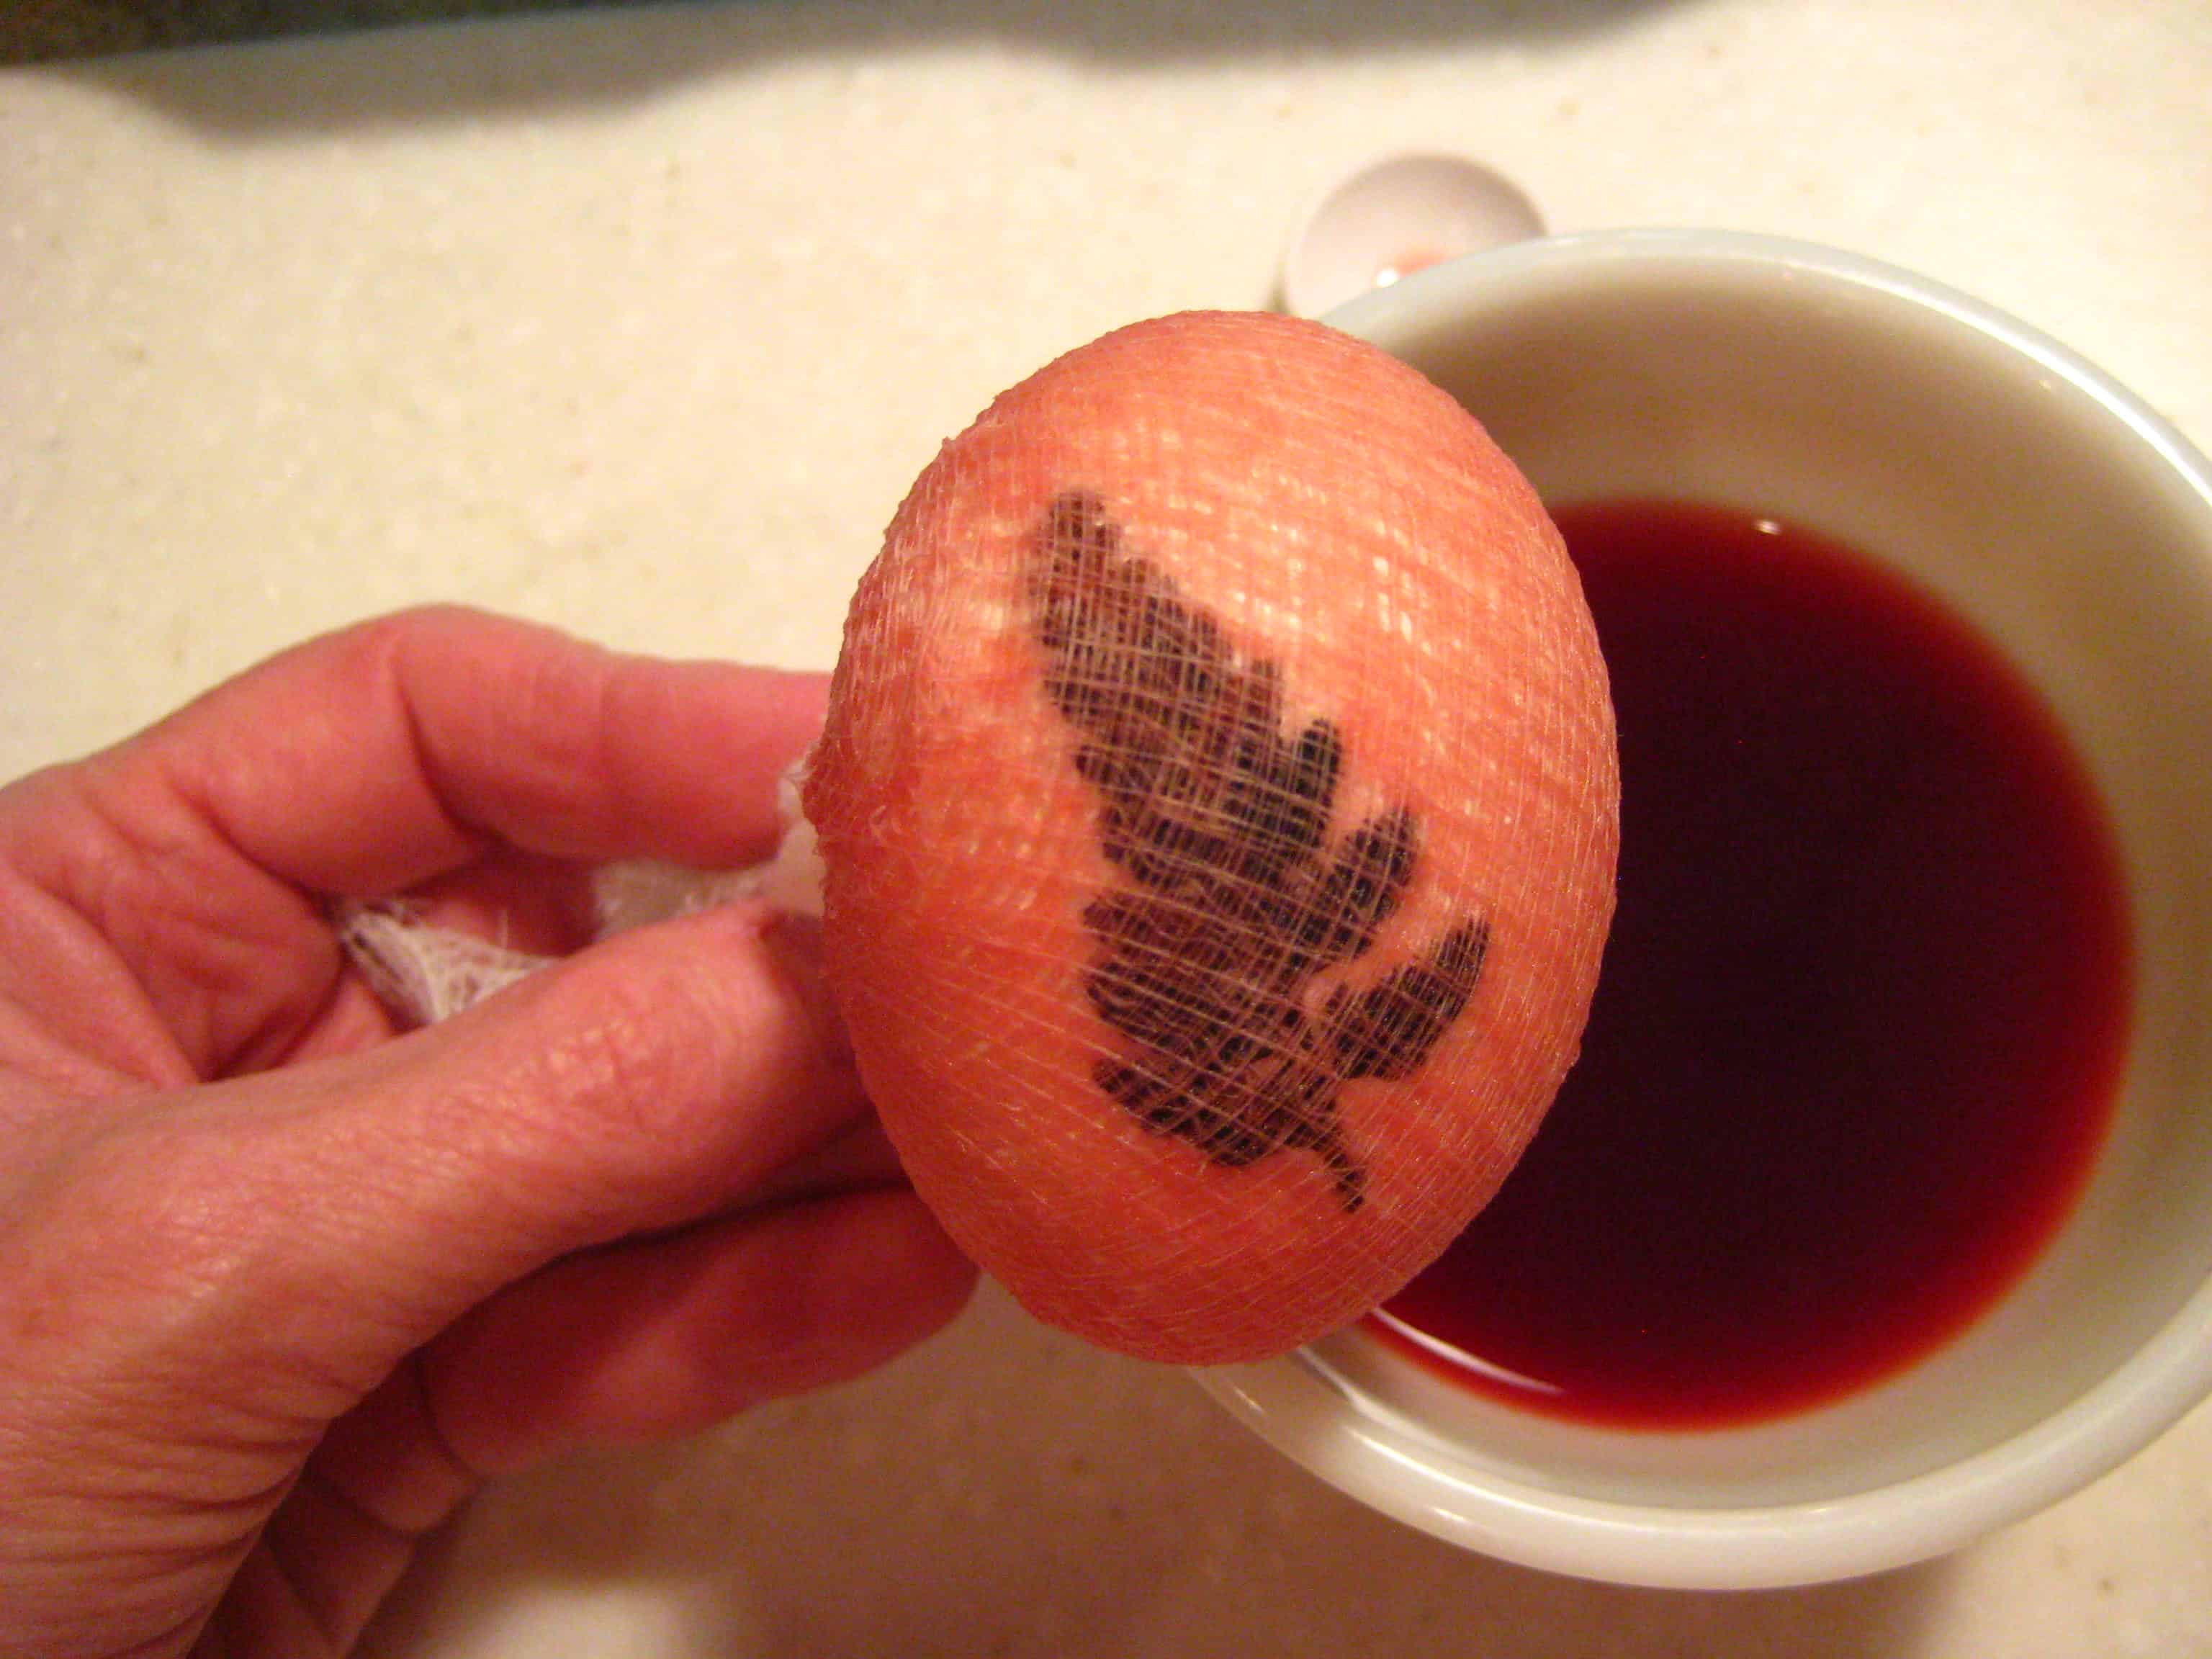
I dropped the egg into the dye bath, and used some household items to weight the egg down. I wondered if I should have colored the egg before I blew out the yolk . Without the yolk the egg wants to float and I think you could blow out the egg after dyeing. Something to consider for next time. I let my egg in the dye bath for several hours. When I took off the cheese cloth, I had a lovely egg! The design was subtle, not a perfect leaf, but I loved the design of the cheesecloth that resembles alligator skin. Interesting how the purple onion actually created a tan color.

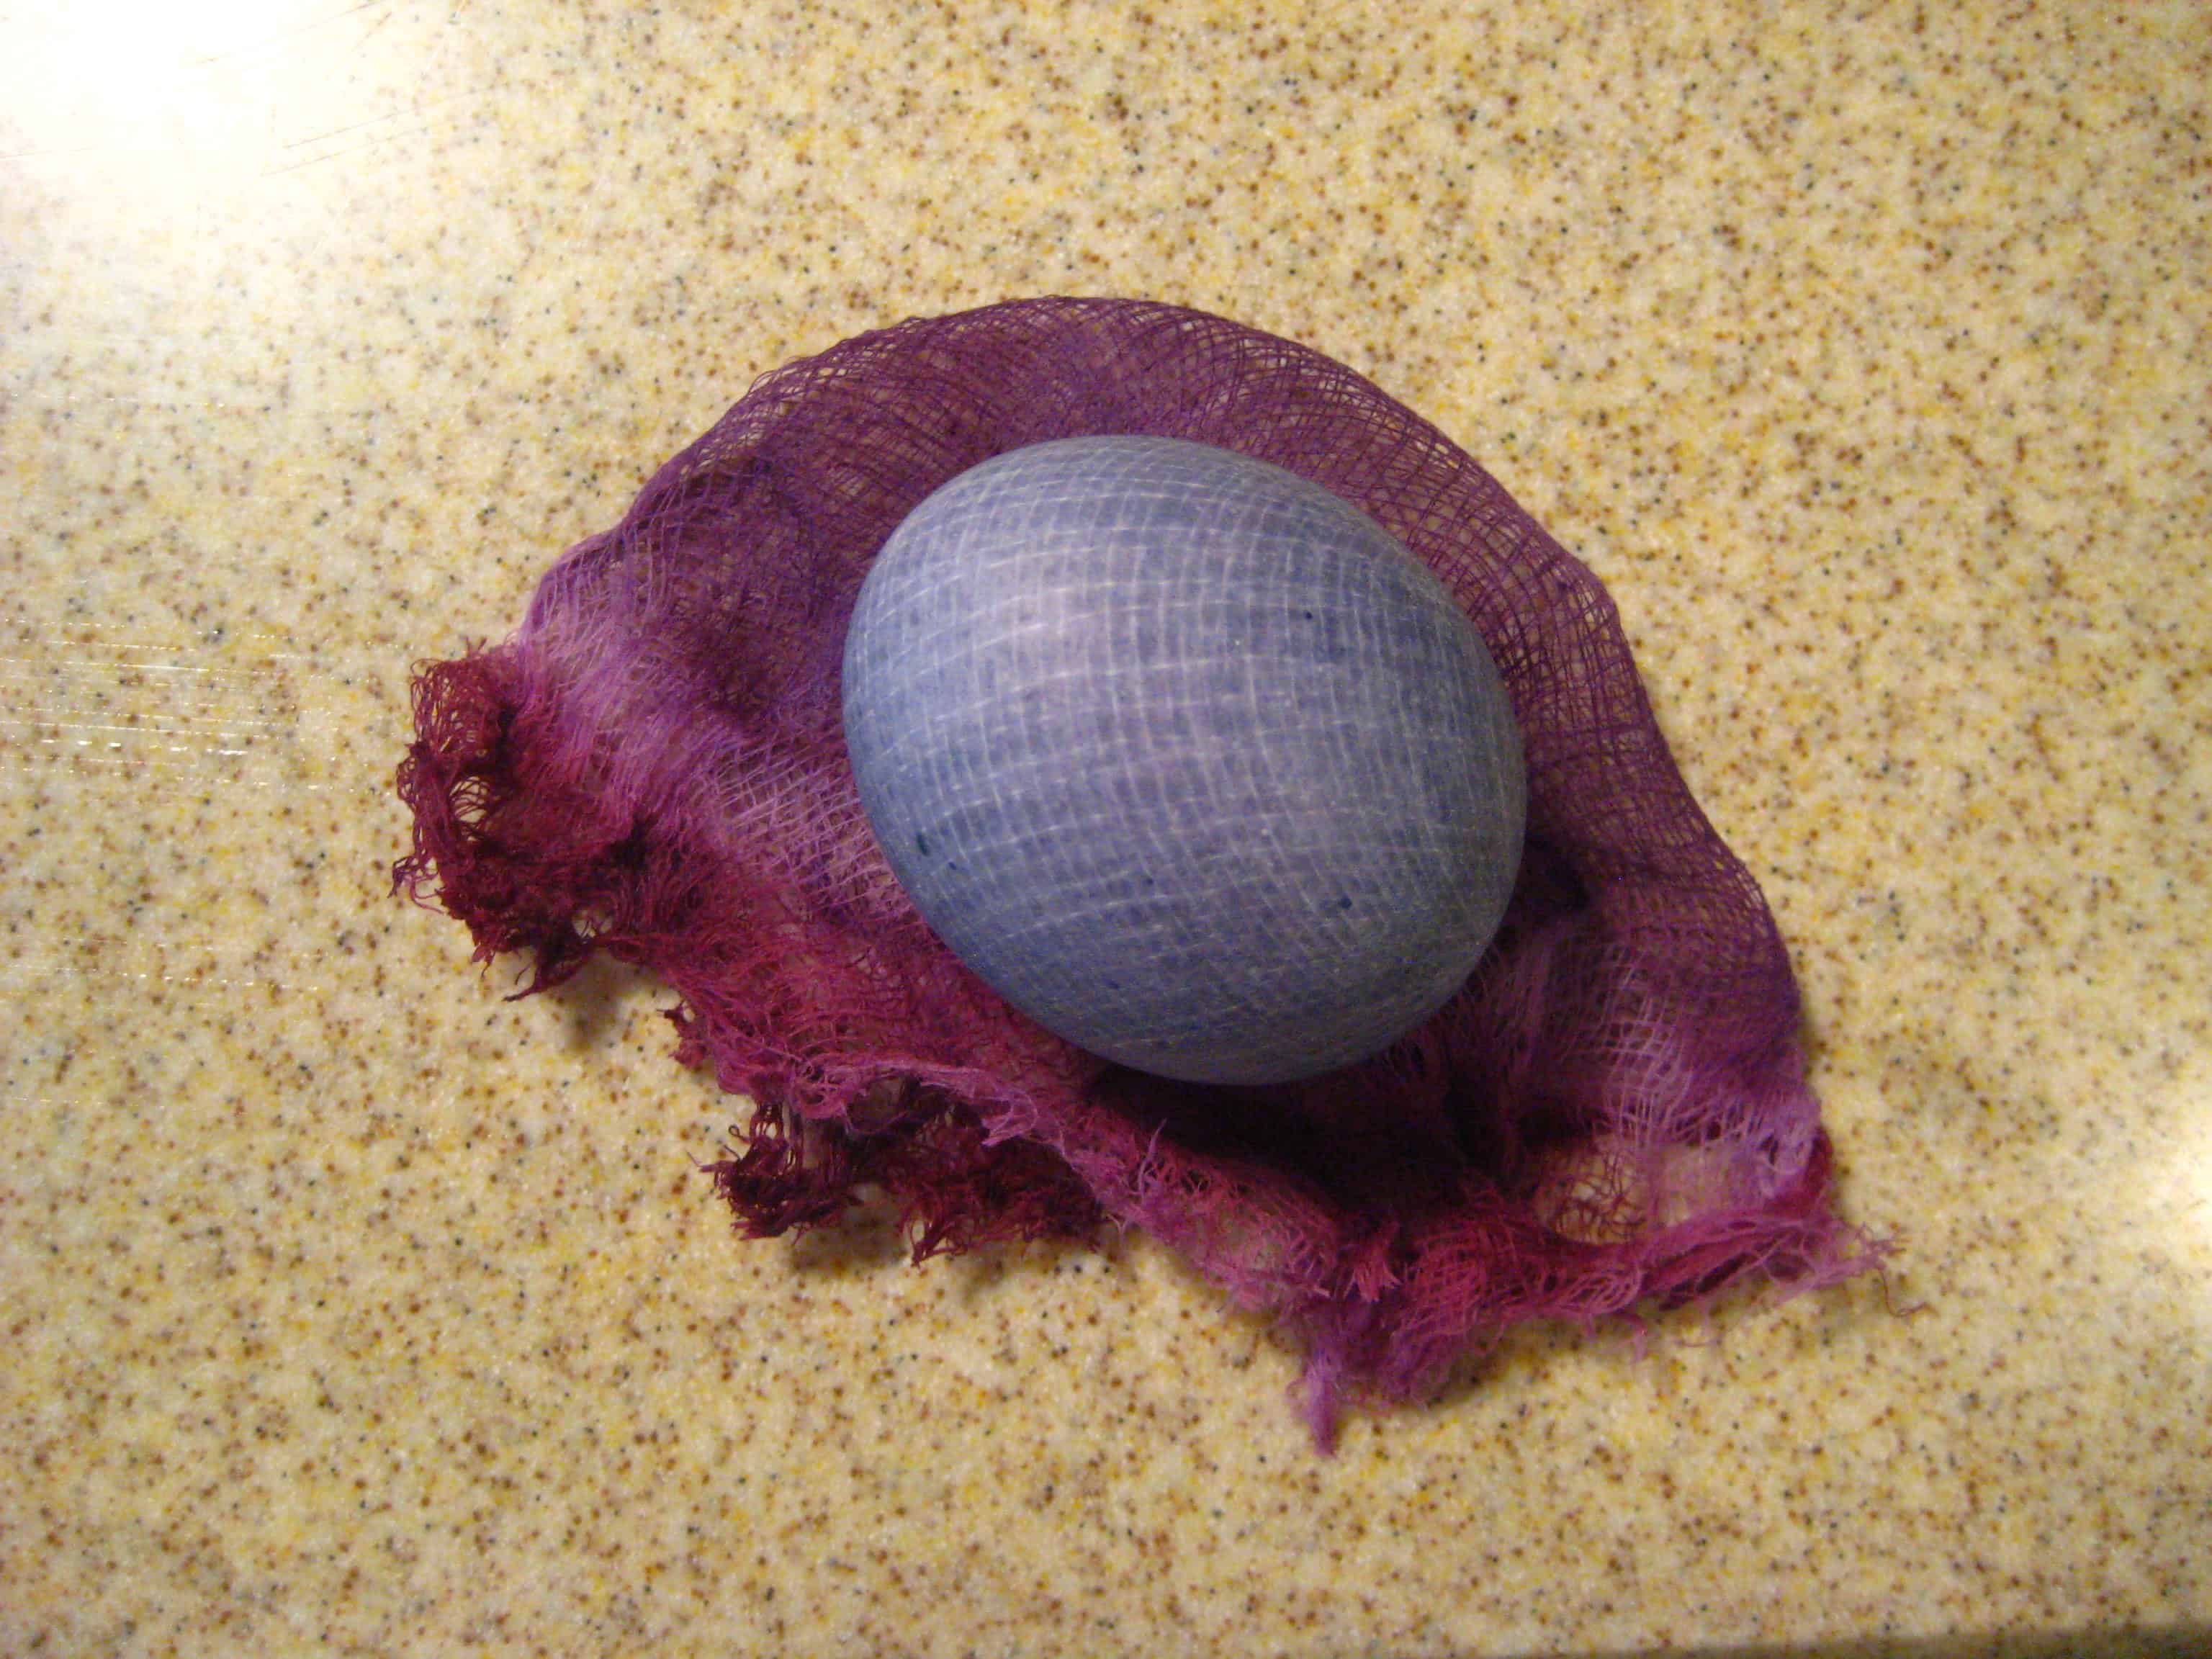
Next I decided to try blueberries to see if I could get a more vibrant color. I had frozen blueberries on hand, so I added them to a pot with some water, and brought the mixture to a low simmer. When the water was looking nice and bluish purple, I smushed (word?) up the blueberries, strained them, and added a little vinegar to the mixture. I wrapped the egg in cheesecloth again because I really liked the pattern it created on my first egg, put the egg in the dye, and let it sit for almost 2 hours. I was really happy with how this egg turned out.
The natural dyes I tried this time around were the purple onion, coffee, blueberries, collard greens, and carrots. The red onion and coffee produced a nearly identical tan color surprisingly enough. The collard greens and carrots produced a very weak color that was not very noticeable. Next time maybe I’ll try some spinach or cranberries.
If you are doing this with your children, and they are helping you blow out the eggs, make sure you get your egg blowing device up and working beforehand. The egg blower did a great job once a few bugs were addressed. Kids hate to wait…when you say “let’s go”, they want to go! If you are coloring lots of eggs, you may want to blow out the eggs after the dying process, eliminating the need for clever weights!
Sometimes as a parent and as a grandparent I want everything to go perfectly with my projects that I’m doing with my kids and grandkids. Trying something new and different, experimenting, produces success and failure, you learn from both.