


Of all the DIY projects that I’ve ever attempted, this one has been my absolute favorite! If you’re a DIY dunce like me, you’ll still be able to create this mirror in one naptime — promise! Not only is this project easy, the process is relaxing and a great way to de-stress.
My inspiration came from this Little Twigs Wall Mirror from the Land of Nod, but at $219 (!!!) I knew I could come up with something way more affordable. I also didn’t want a mirror nearly as large as theirs. I wanted something that would serve as an accent piece.
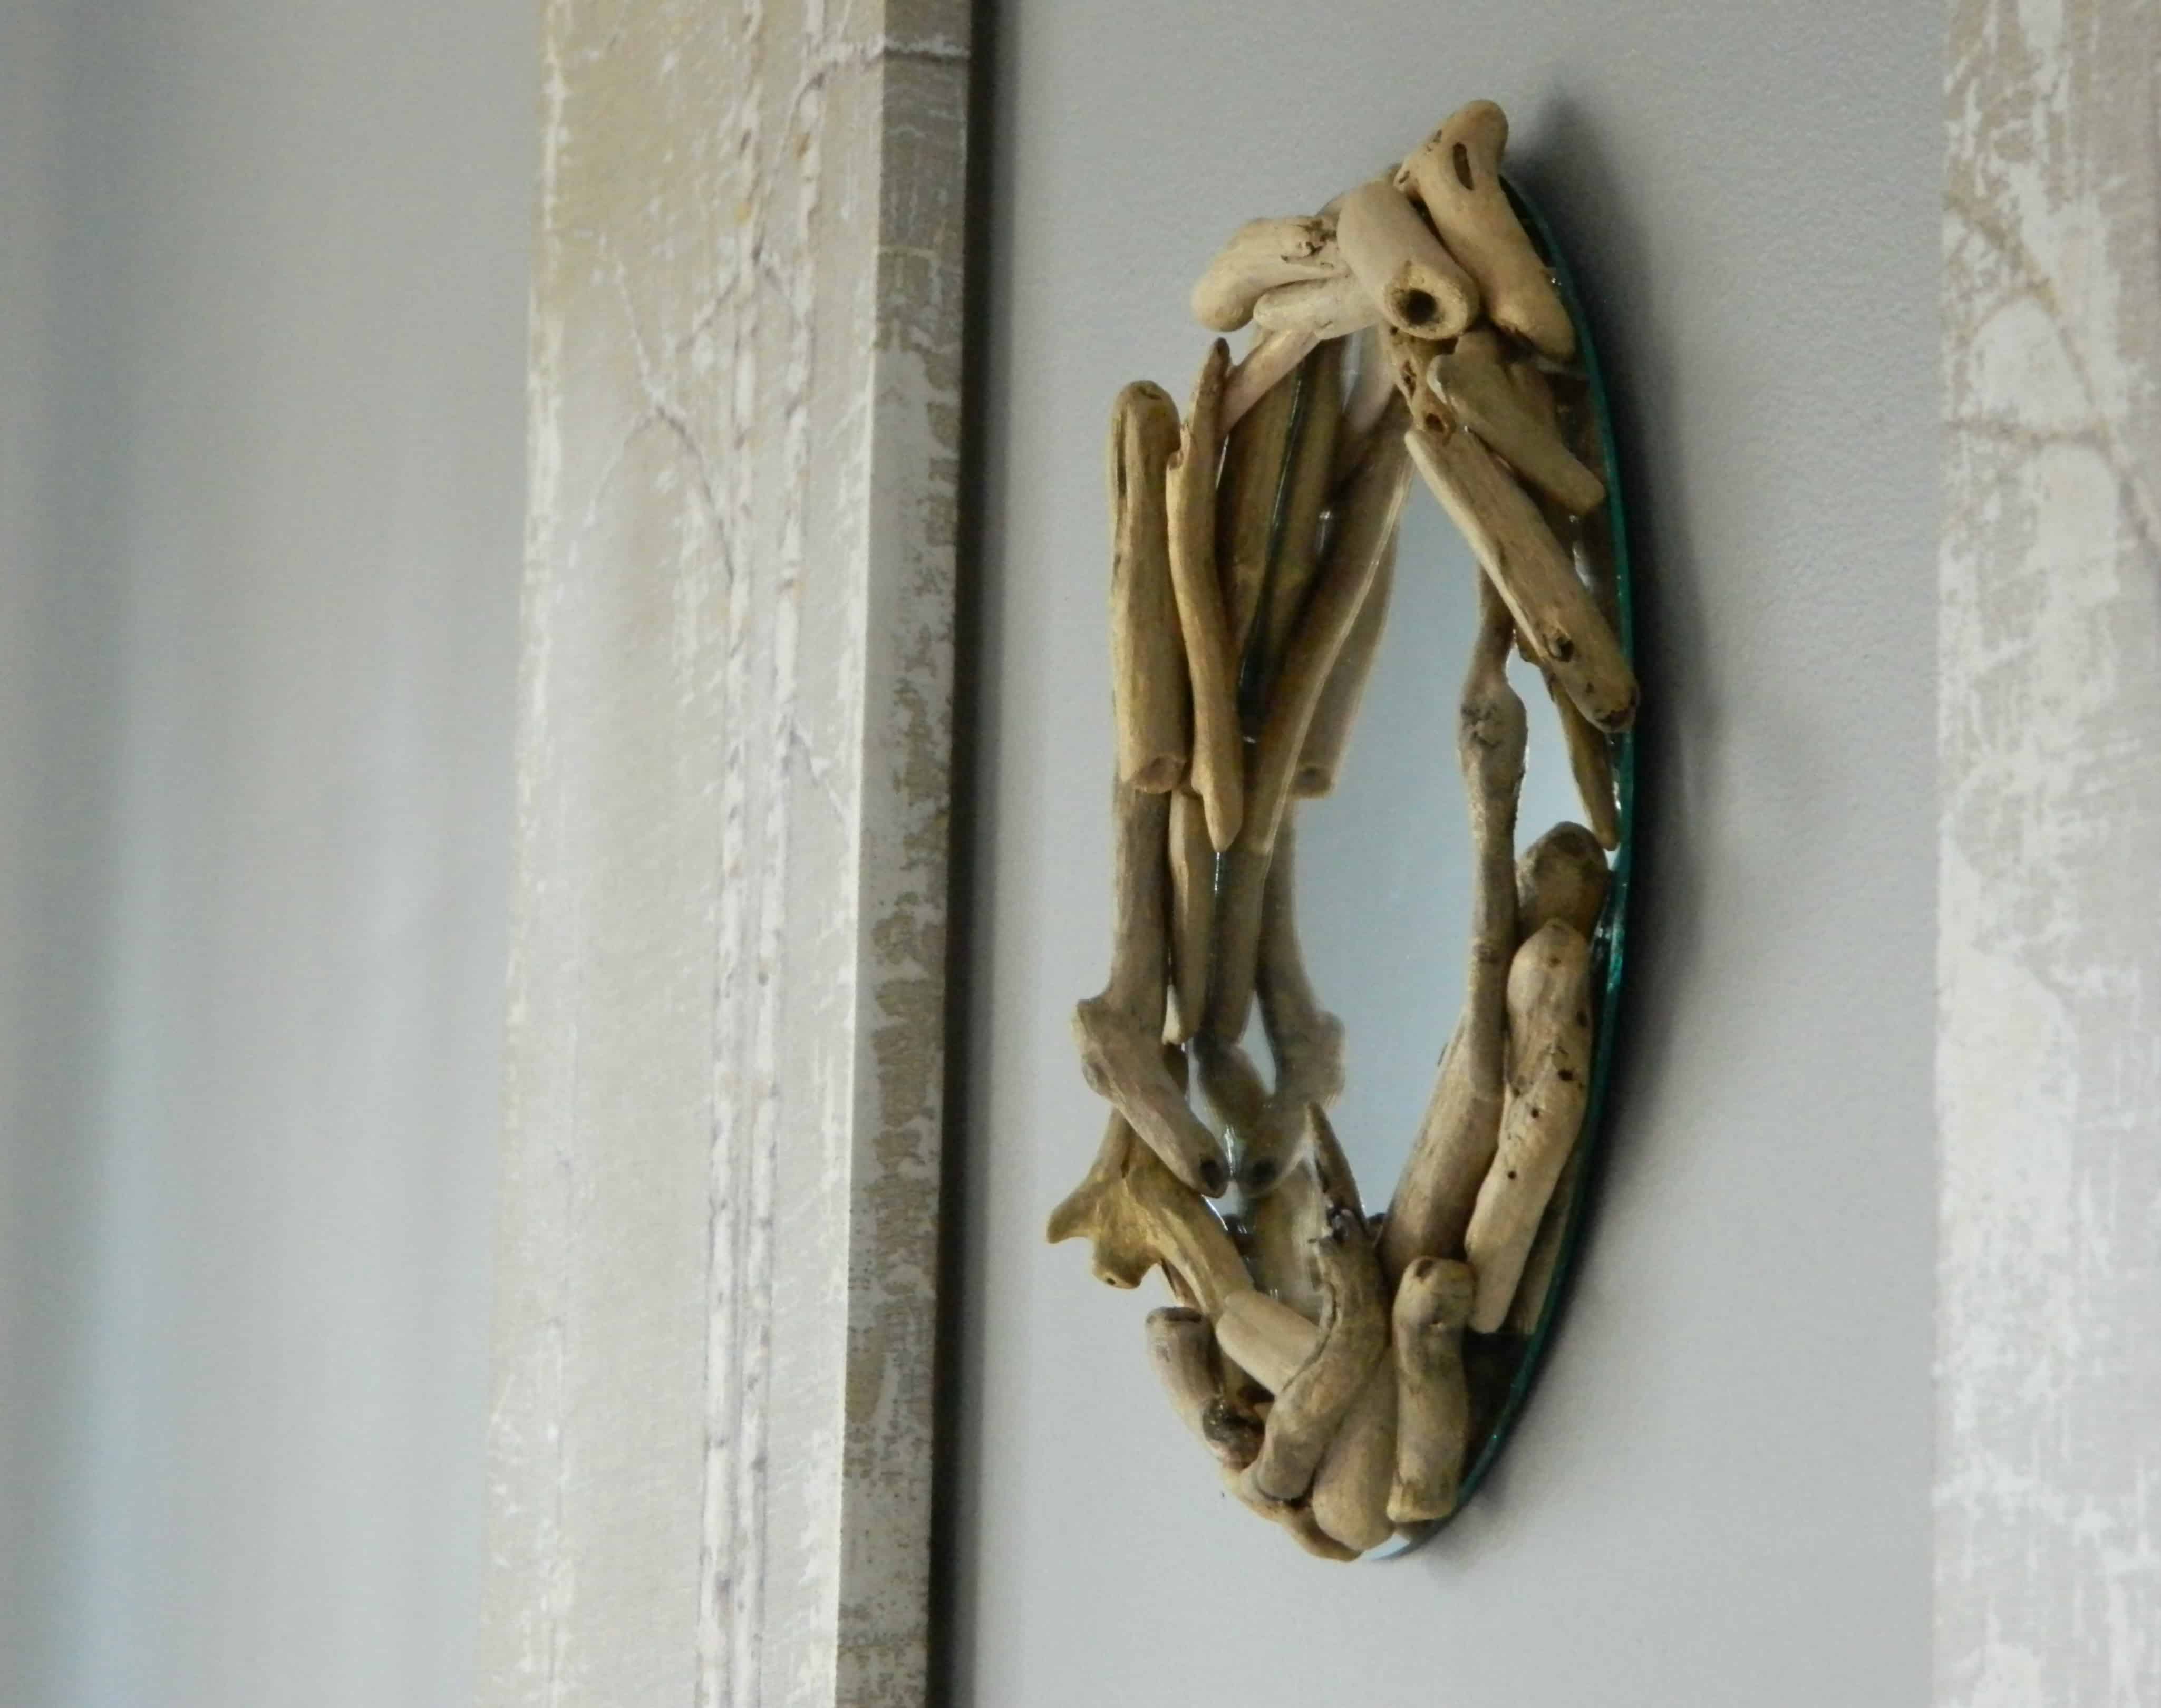
For $28 and one naptime, you can create your own gorgeous driftwood mirror.
Ready?
Here we go!
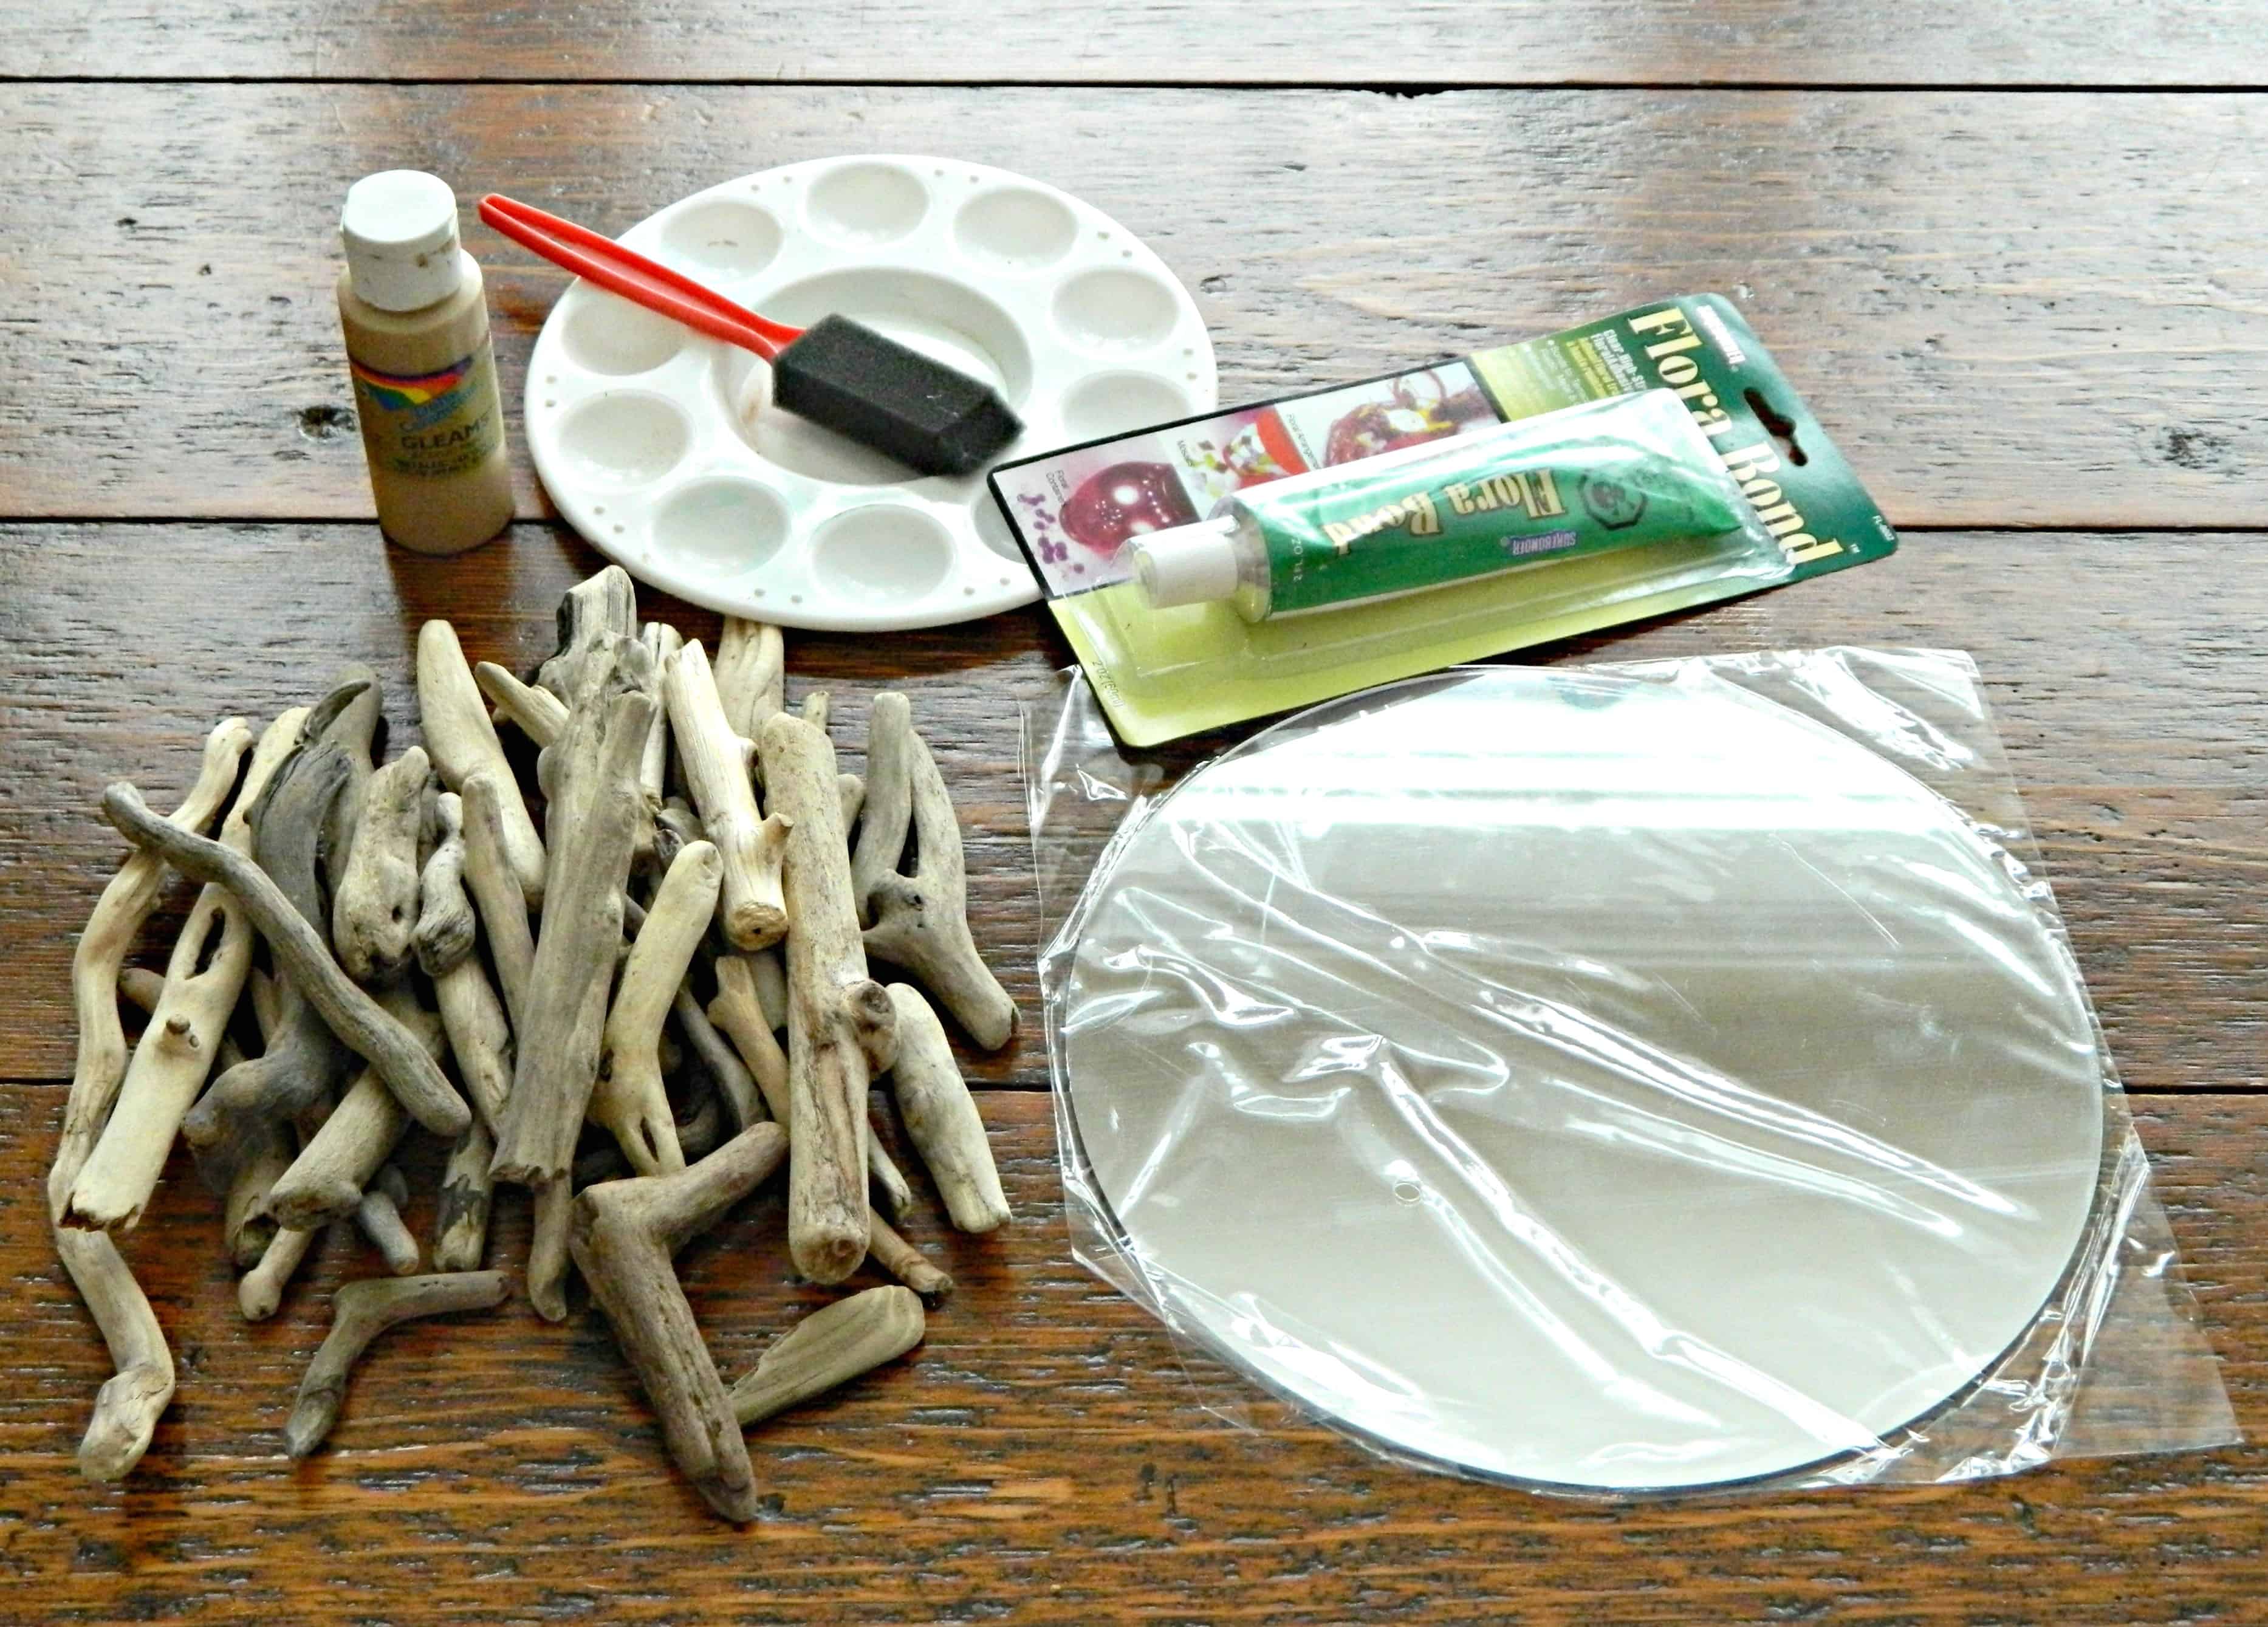
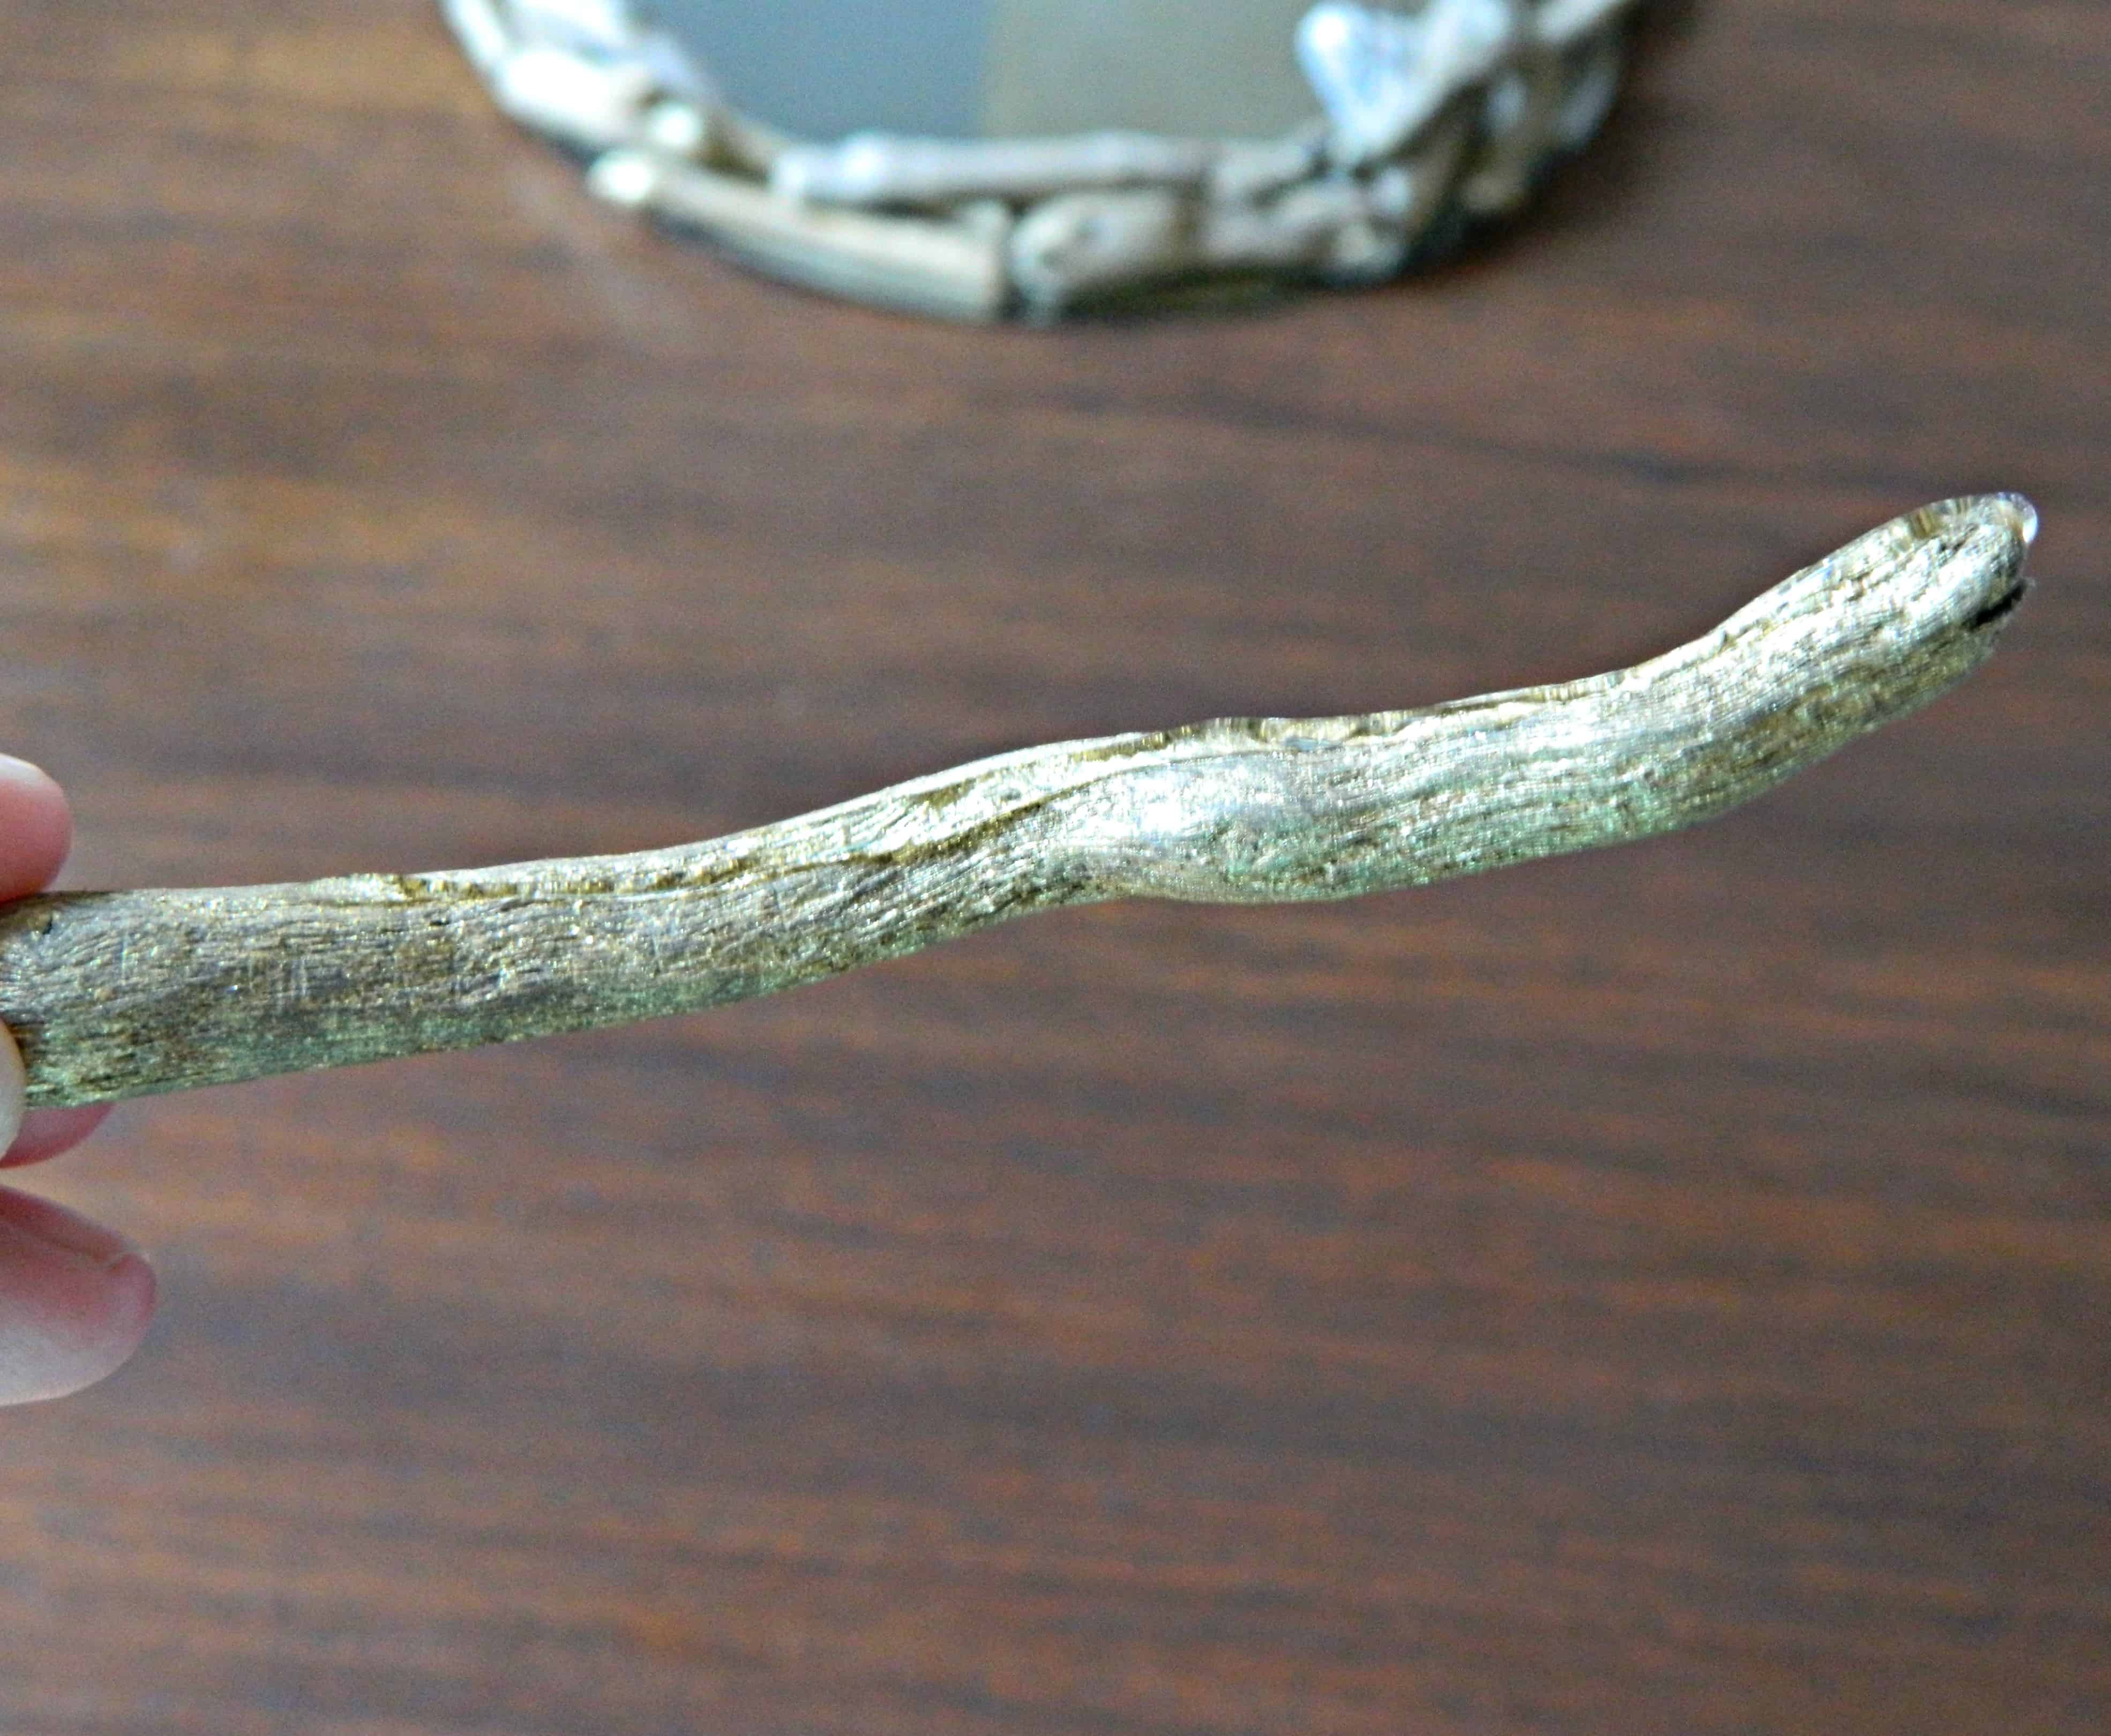
1.) Gather supplies. You will need: a mirror (we used one 10 inches in diameter), Flora Bond glue, Driftwood in assorted lengths and textures (ours varied in length from 3 to 7 inches), paint (we used DecoArt Glorious Gold), a foam paintbrush, and a surface to paint and glue on.
Sarah and I found that it was difficult to find a driftwood source in a small enough quantity, affordable shipping, and with a nice mix of different textures and lengths.
Lucky for you guys, we’ve made this really easy! We created a listing in our etsy shop where you can grab everything you need for this project all in one place, complete with step by step instructions and photos right in the box. Open up your kit, get to work, and ta-da! in one naptime you’ve created something beautiful for your home. Shouldn’t DIY always be this easy?
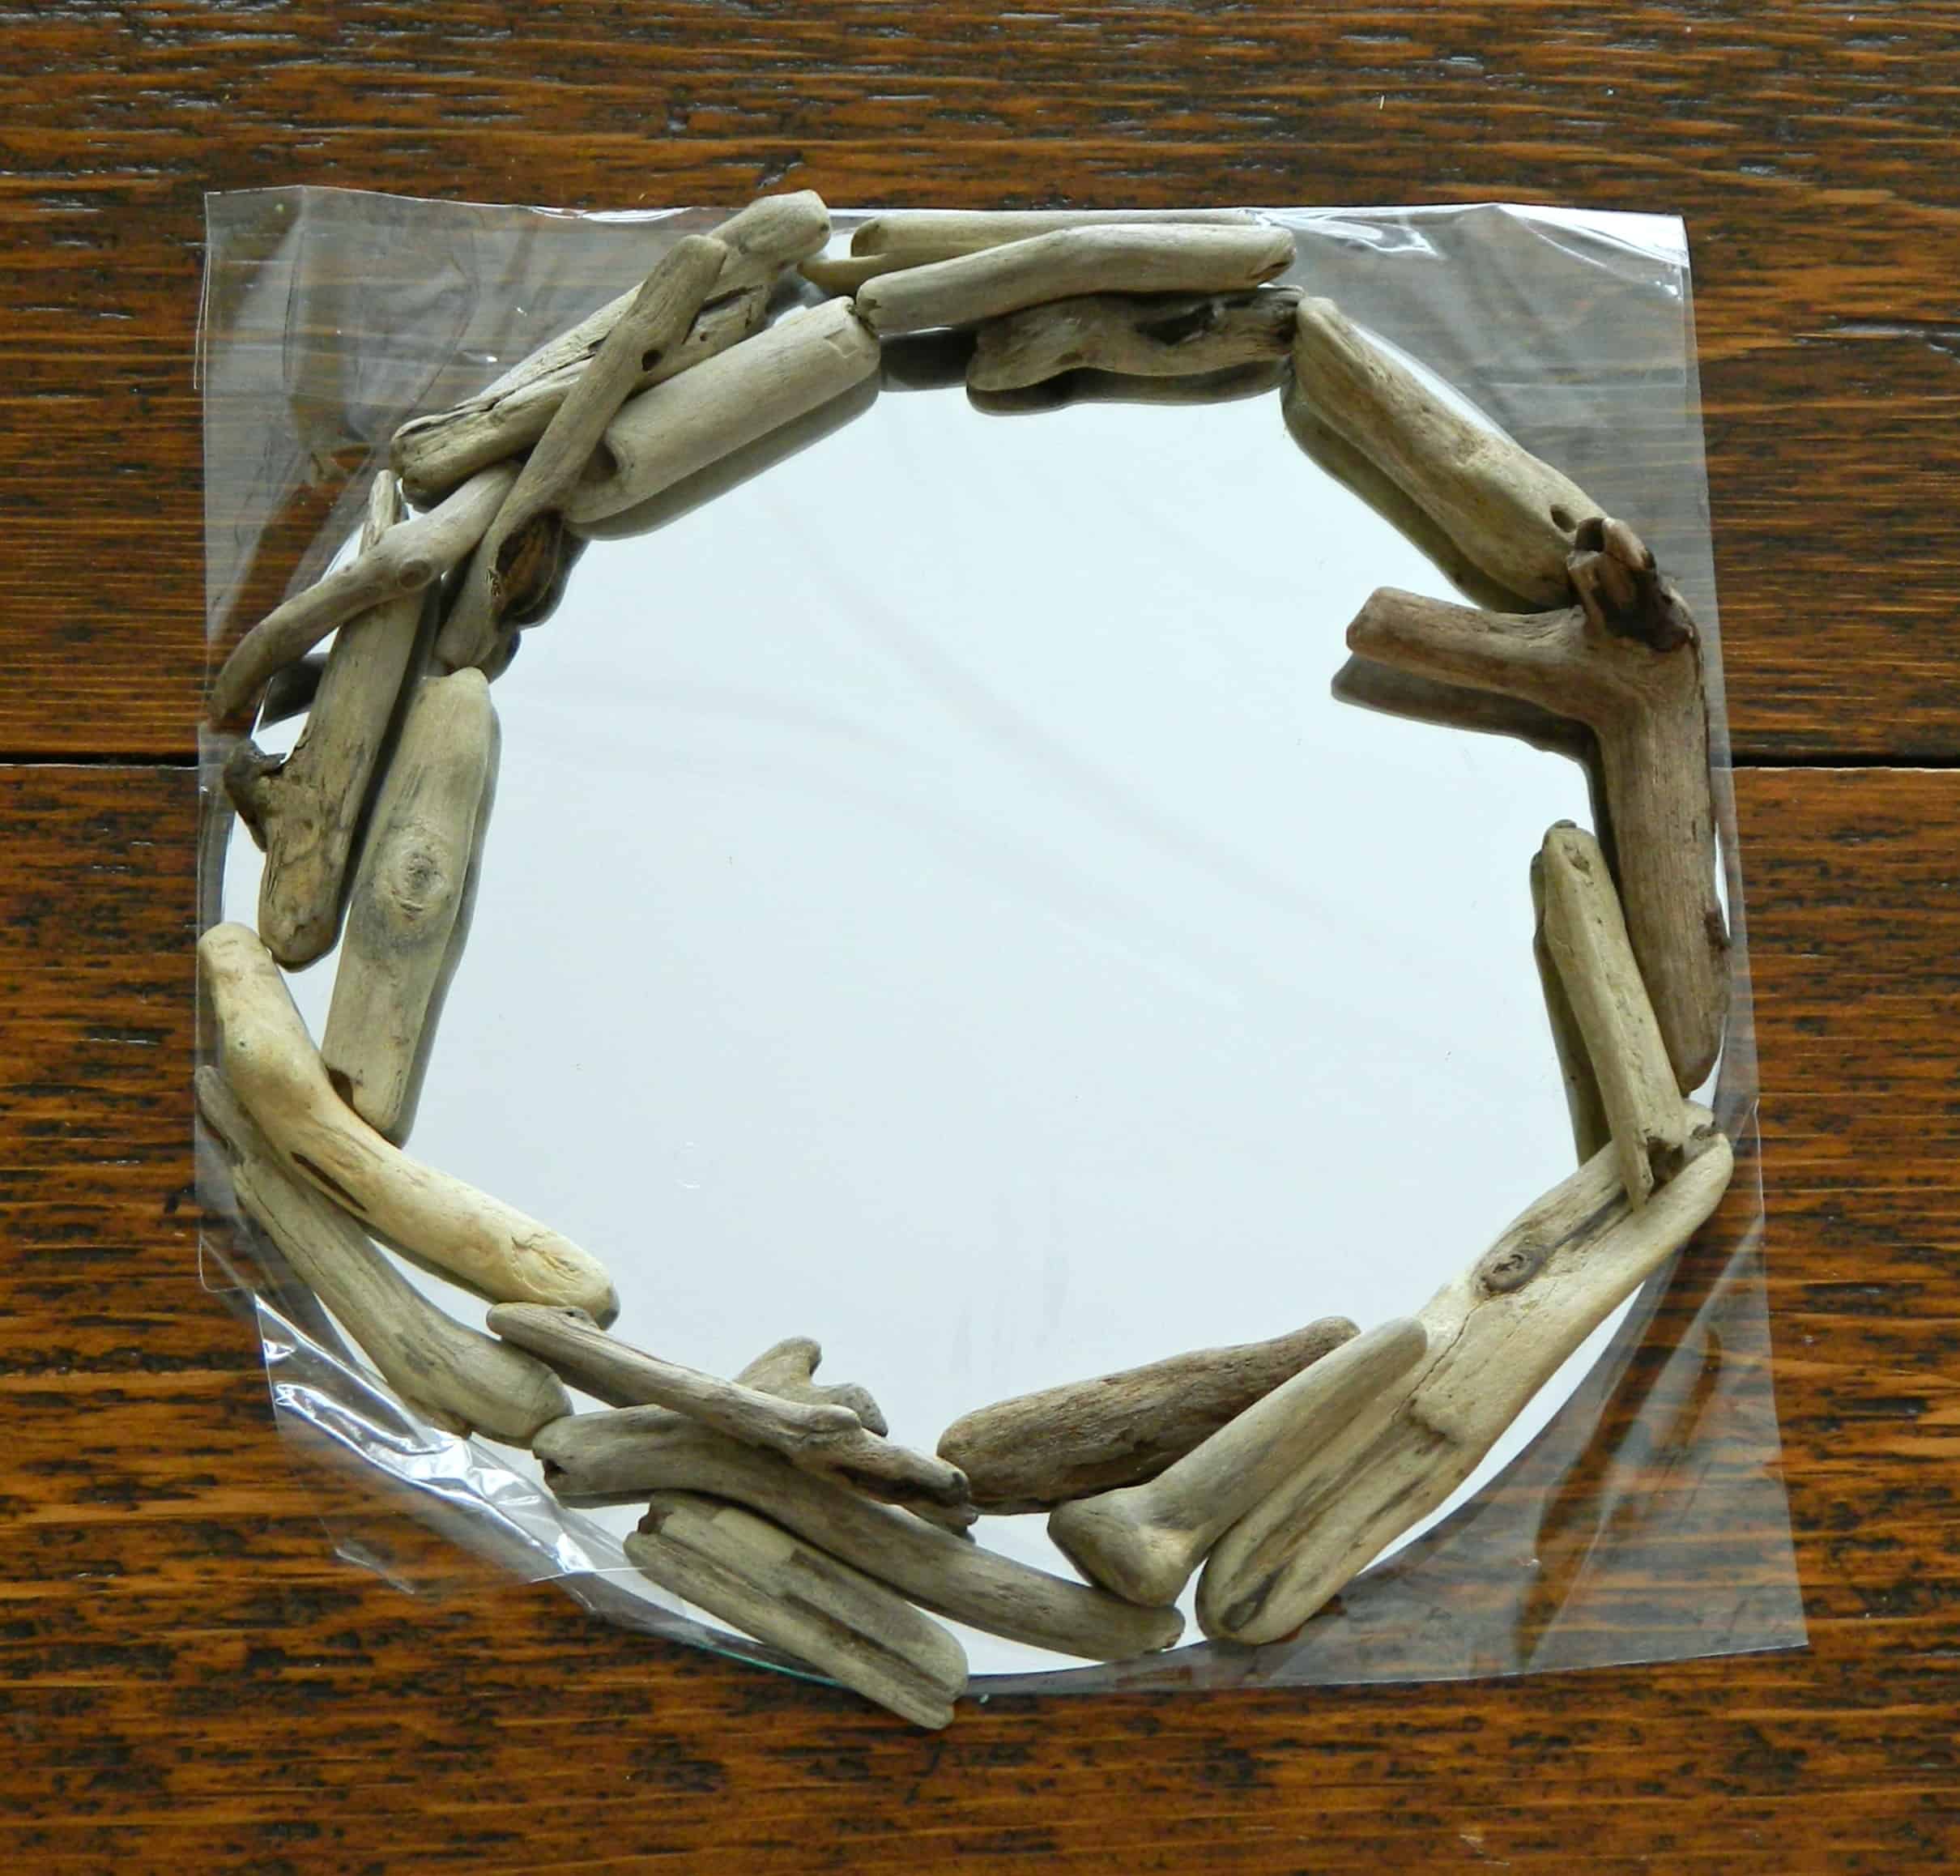
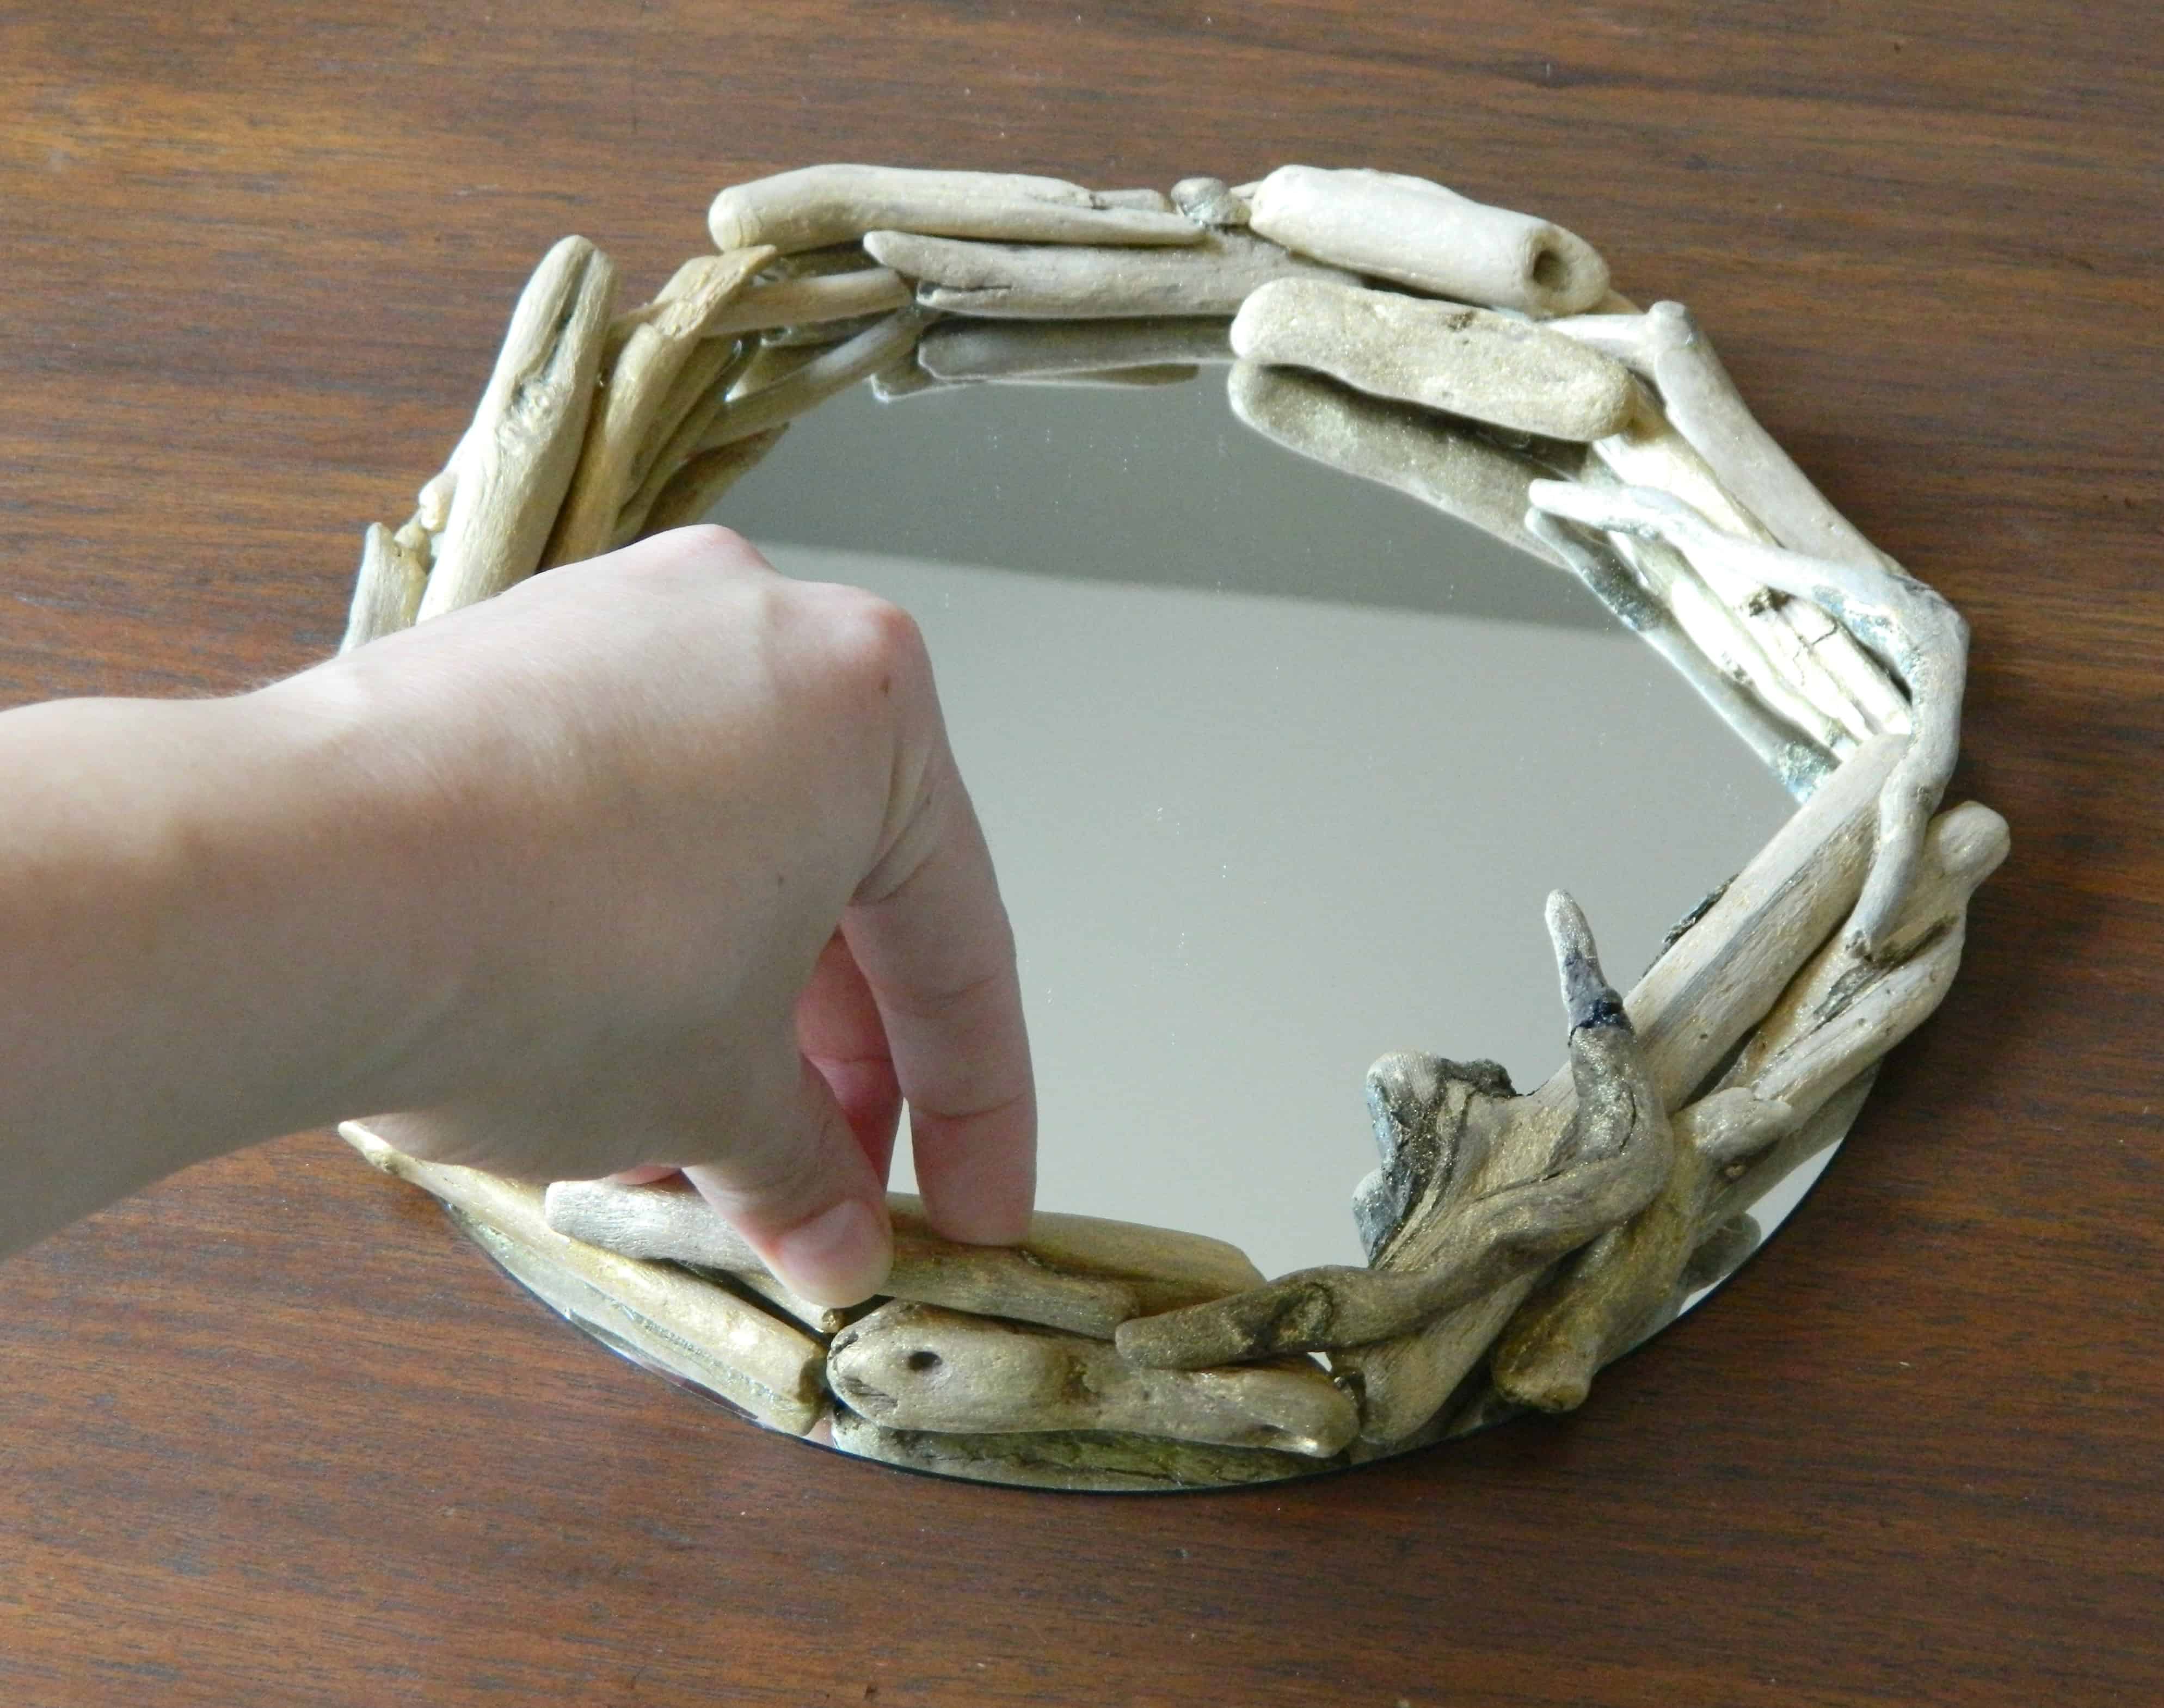
2.) Arrange your driftwood around your mirror. I kept the plastic on to protect the mirror, and really, this is just to get an idea of how you want things to look and how many pieces of driftwood you will need.
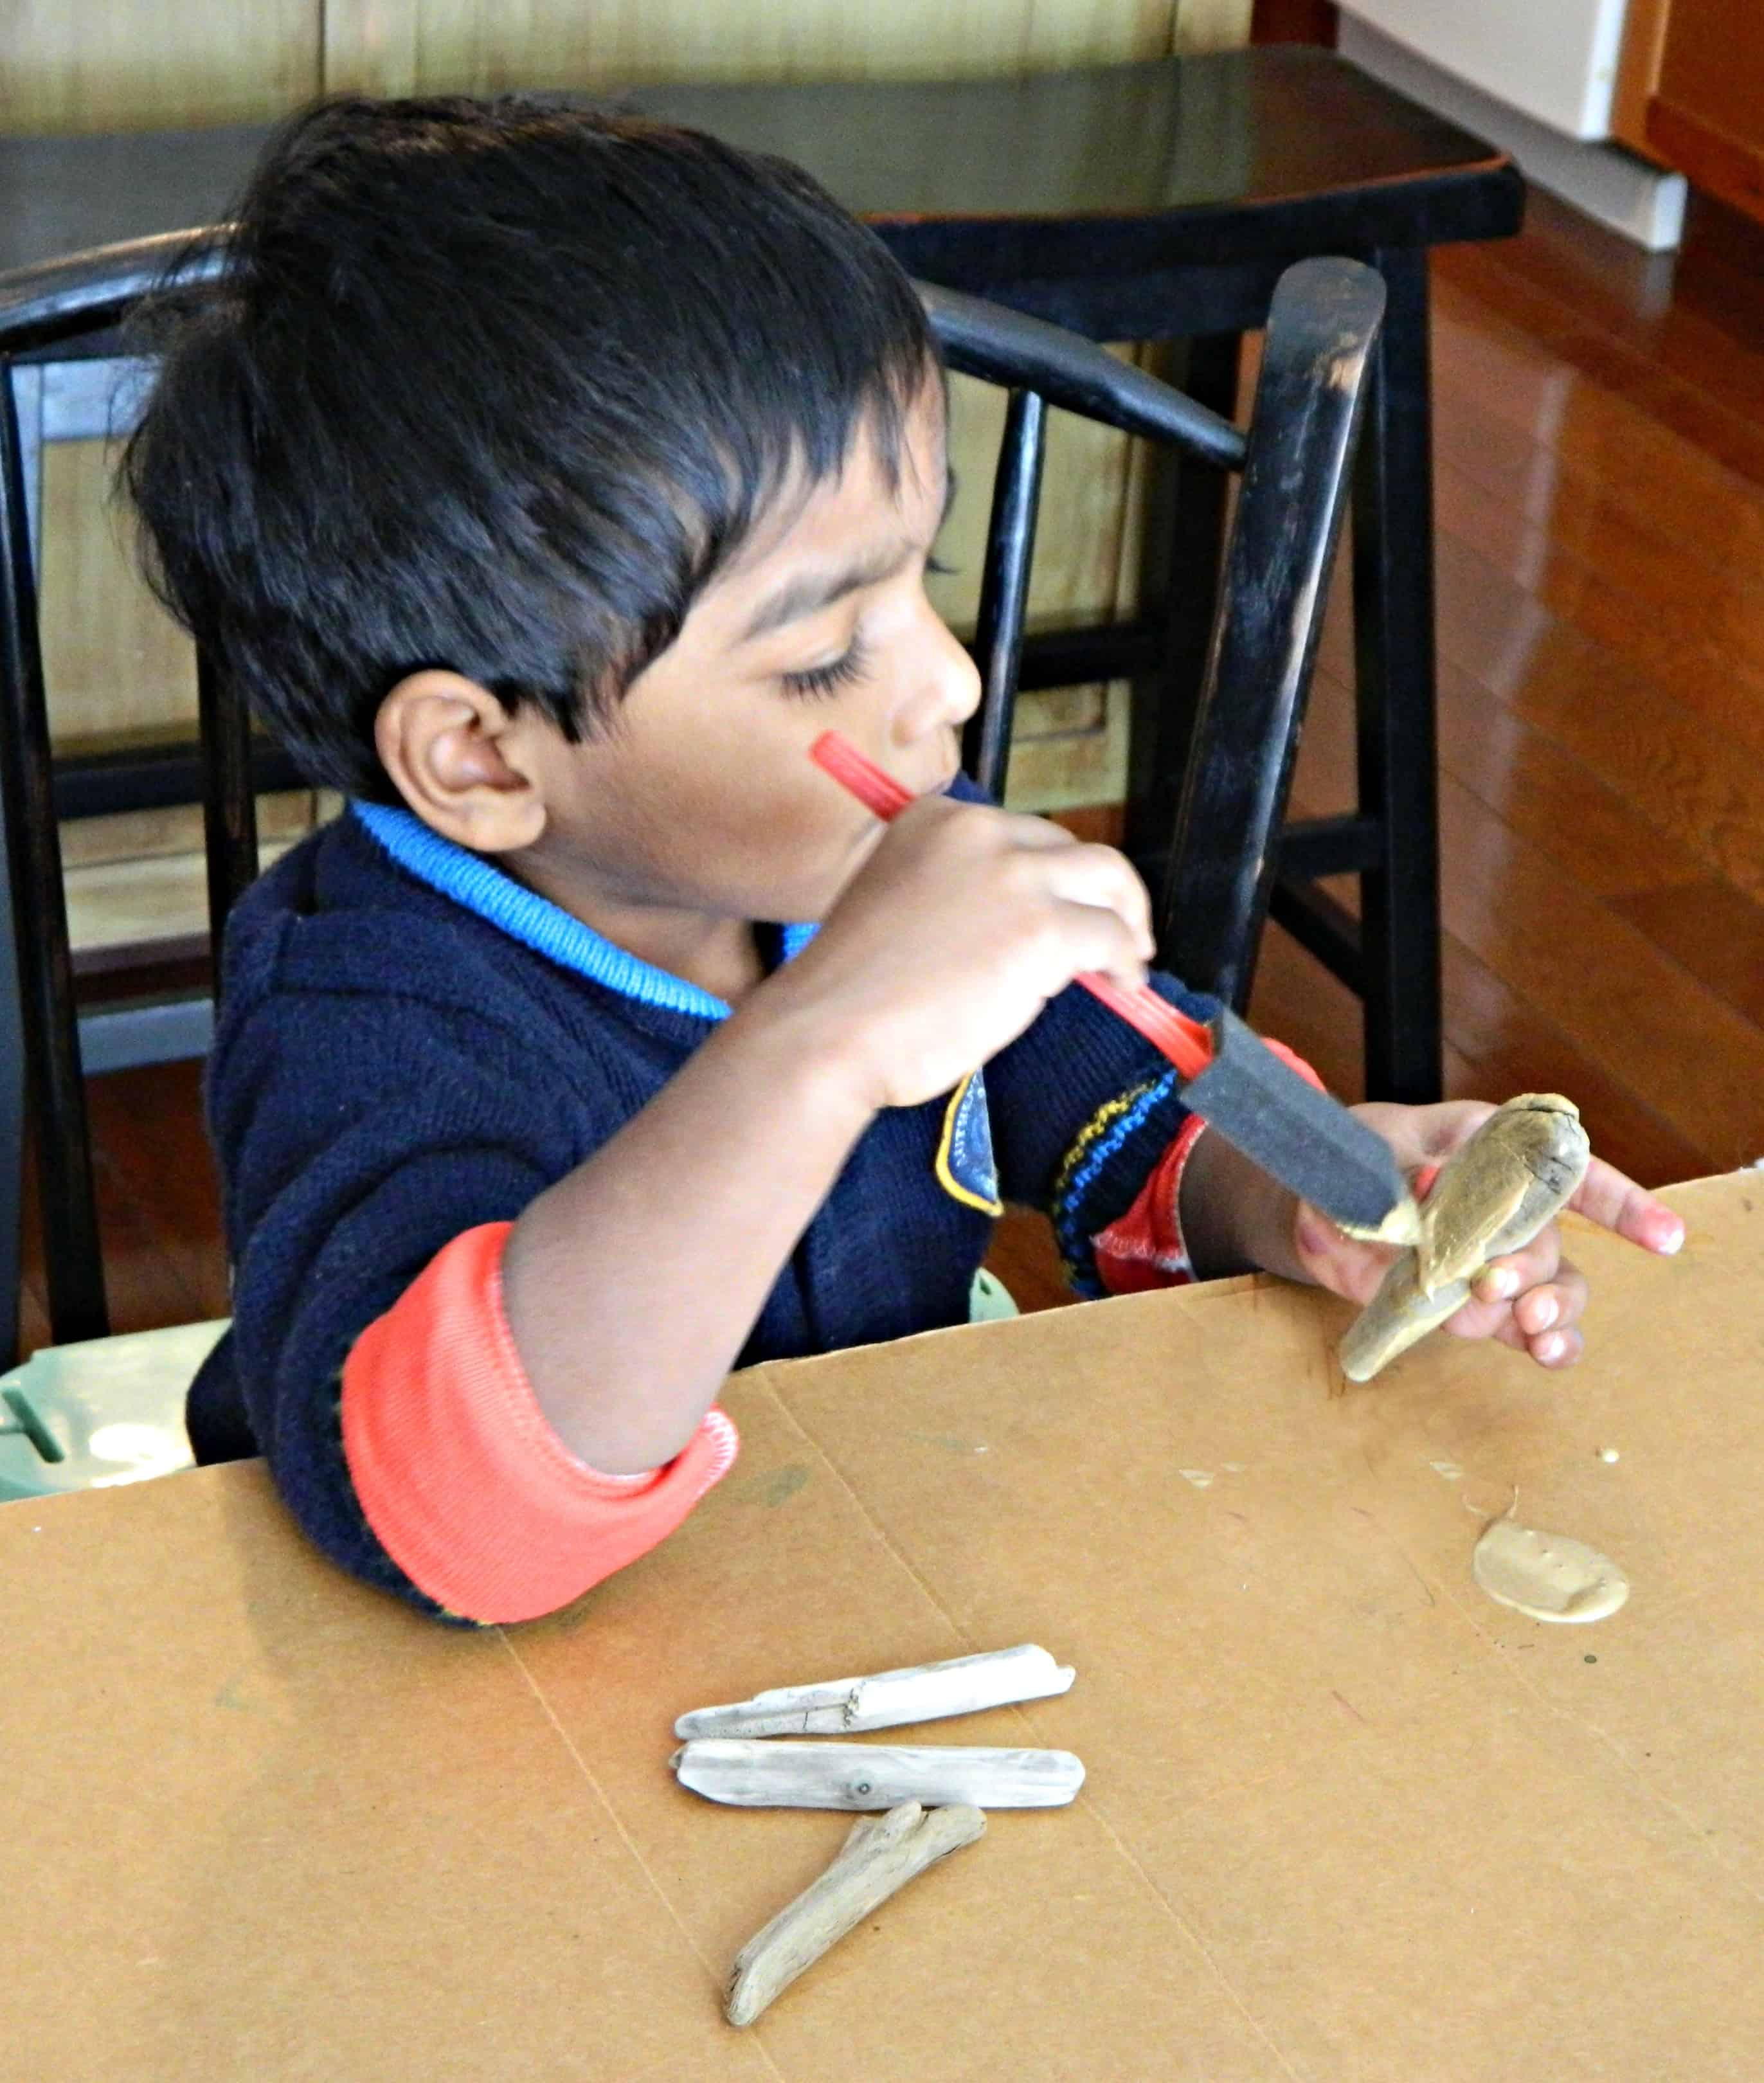
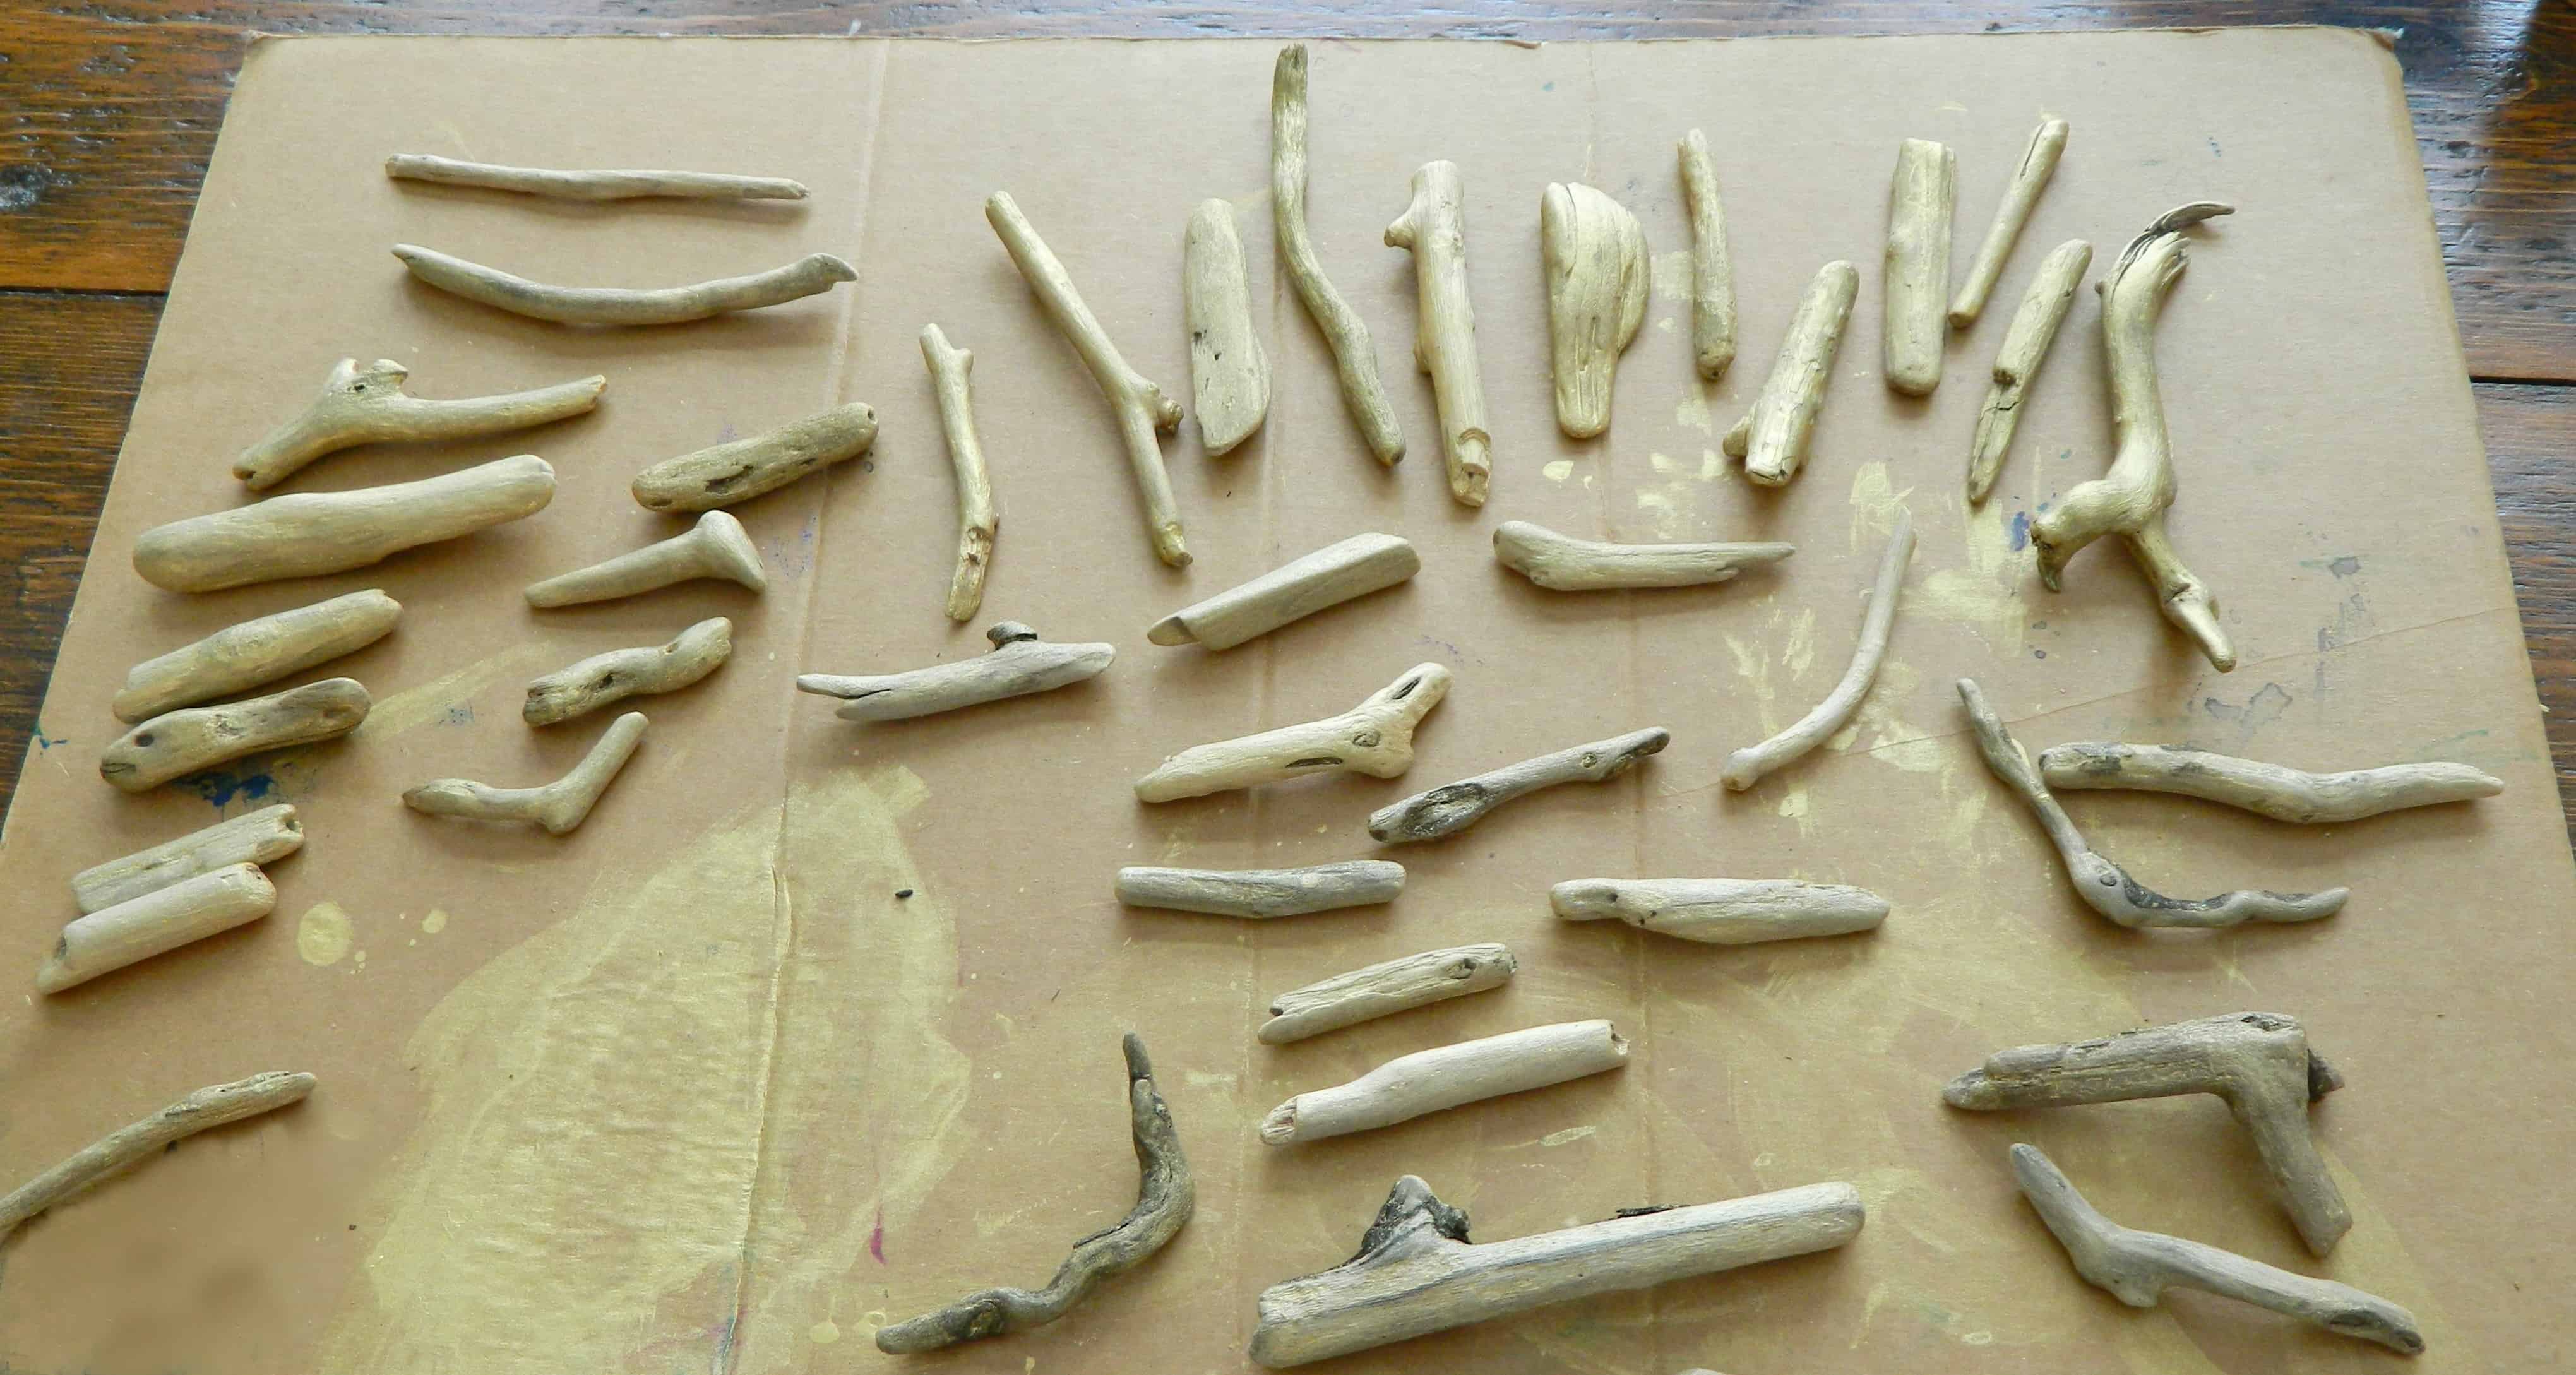
3.) Paint your driftwood (if desired!). In order to let the beauty and texture of the driftwood show through, I mixed my paint about 50/50 with water. This made it more like a “wash” and looked really lovely and natural. My 3 year-old, Holden, helped me with the painting. He thought it was so much fun!
4.) Let it dry. (This took less than an hour since my paint was thinned with water.)
5.) Unwrap your mirror and glue that driftwood on. I had never worked with Flora-Bond glue before this project, and I have to say that I really love it! (Unfortunately, it has a scary skull sign on it, so I wouldn’t let your kids near this one!) It’s kind of a gel texture and it takes a while to dry which gives you plenty of time to pick up your piece of driftwood and move or re-arrange it. To glue, I just put a nice line along each piece of driftwood and laid the piece down on the mirror, overlapping pieces as I went.
Just keep in mind that your creation will easily move and slide until the glue is dry, so work gently and carefully. Since this all happens on a nice, flat surface, I didn’t have any trouble getting each piece of driftwood to stay where I wanted it to. I held each piece gently for maybe 30 seconds before moving on to the next piece. Bonus: Even though the glue packaging looks scary, it rinses off really easily and will not damage your skin or “super-glue” you to something!
6.) Let your glue dry. I recommend waiting a good 24 hours just to be safe. Once the Flora Bond dries, it is really secure.
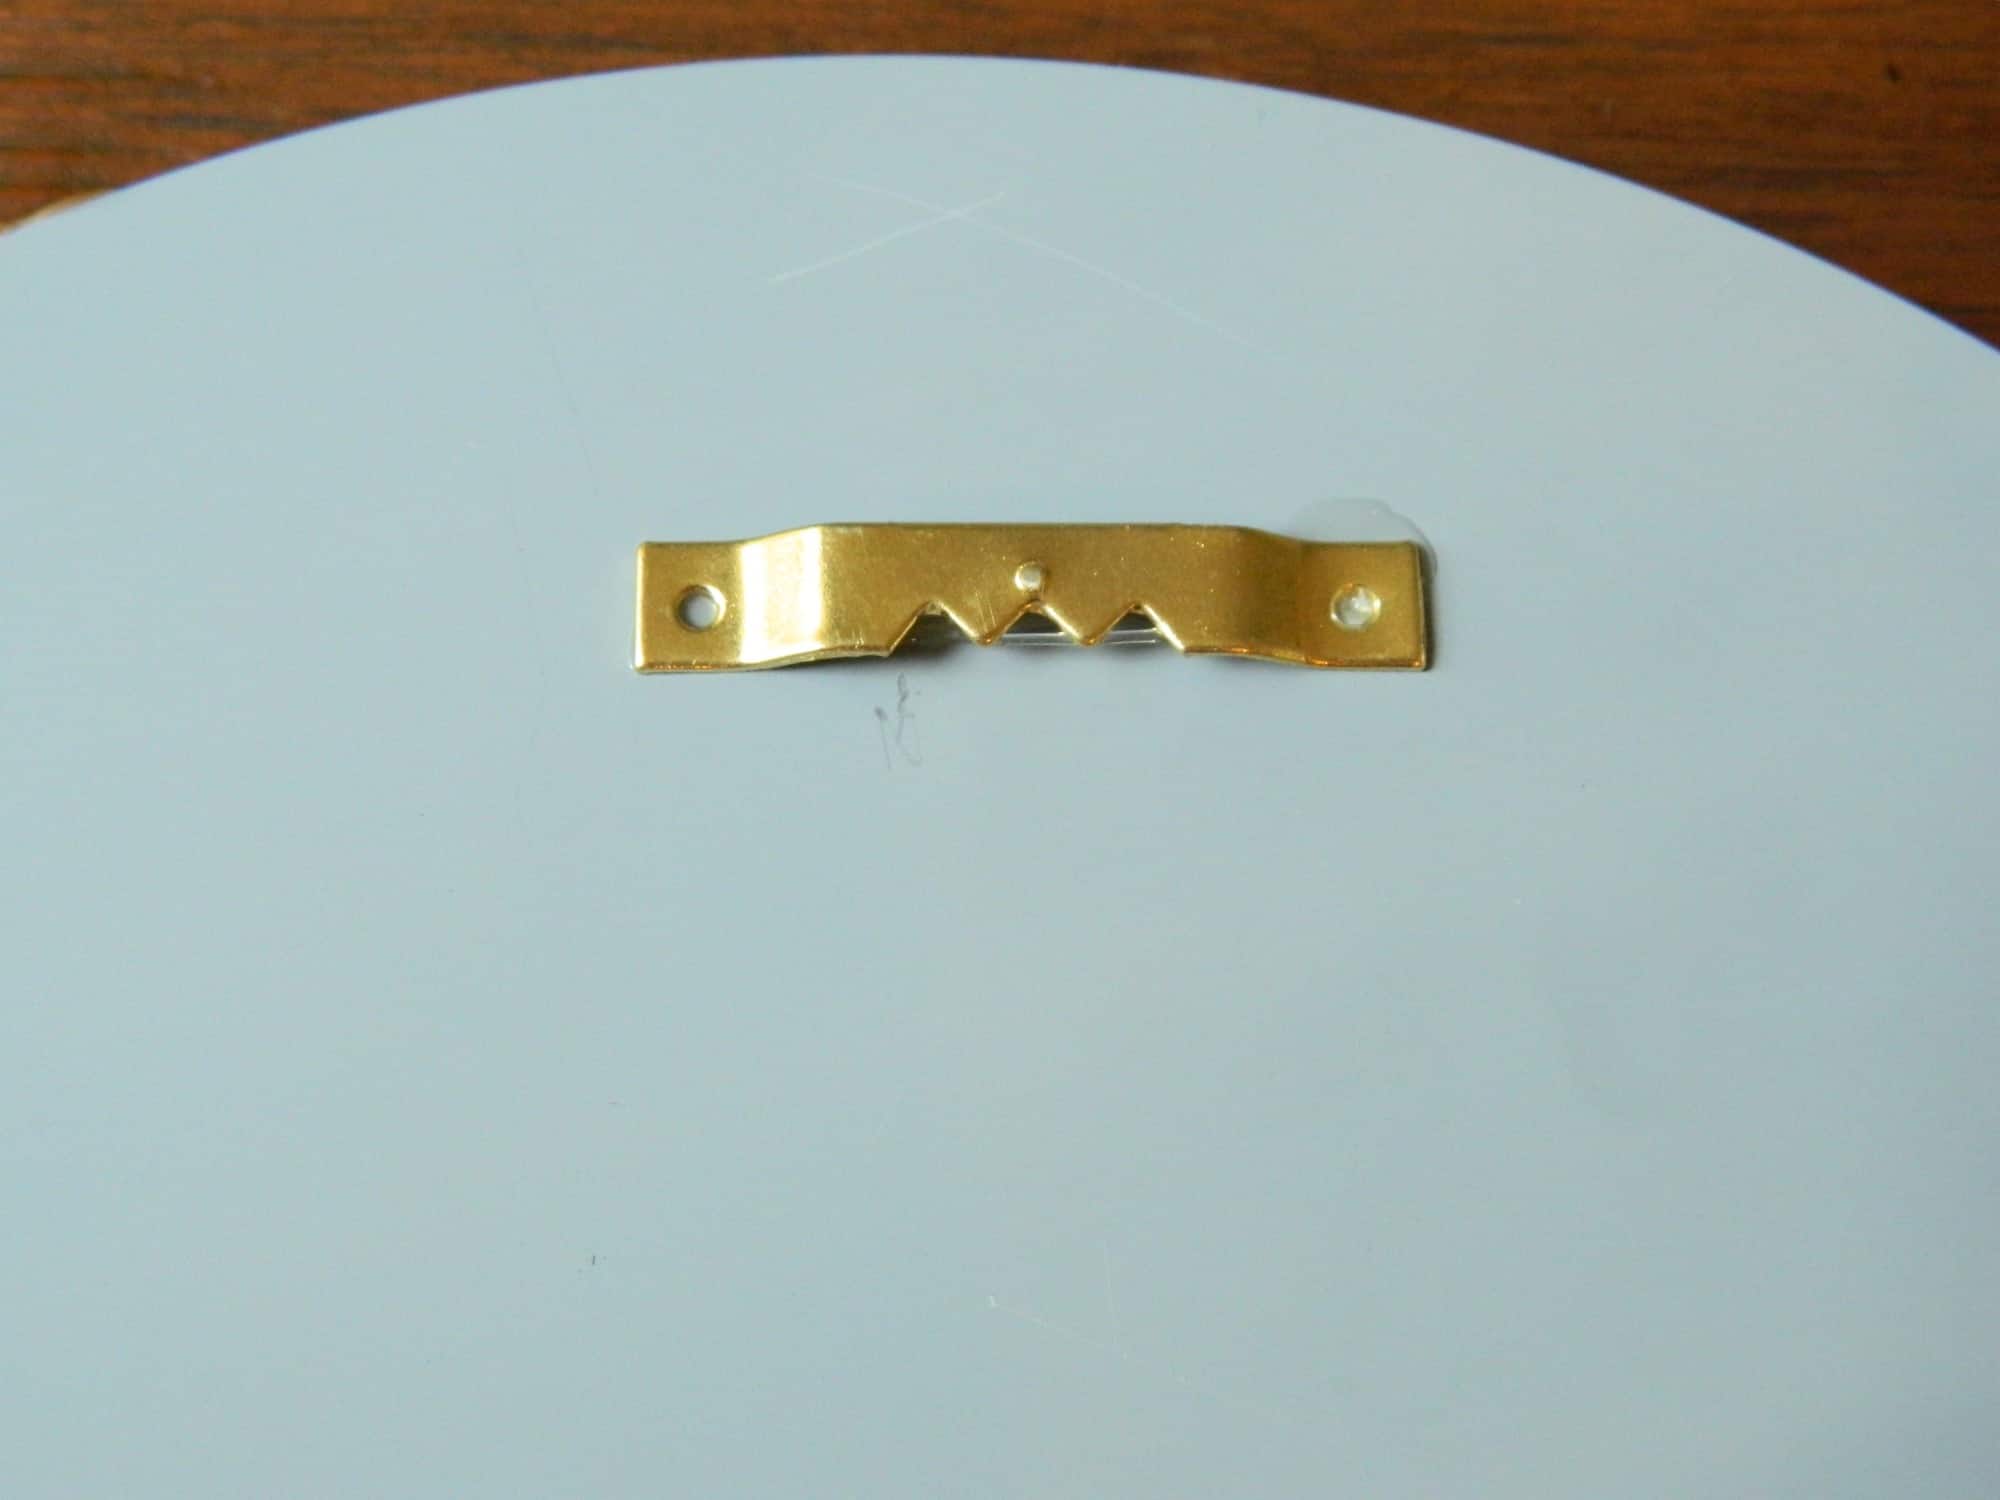
7.) Glue your sawtooth piece to the back of the mirror using the Flora Bond glue.
8.) Again, let this dry for a good 24 hours and then enjoy your gorgeous driftwood mirror!
This is one of those beautiful accent pieces that works in every room.
It’s a fun accent for a shelf or gallery wall, and wouldn’t this mirror look great in a nursery?
I am already dreaming about painting one pale pink or green for a little girl’s room.
Later this week, we’ll go hunting on the beach for driftwood and other items affected by erosion, and we’ll talk more about erosion on Science Sunday.
Don’t forget to Pin this one, and let us know if you try this project!
P.S. Make life easy for yourself. Grab everything you need right here.

P.S. We’ve linked this project up to One Project at a Time at A Bowl Full of Lemons, and Hit me with Your Best Shot at Just a Girl and Her Blog